UPDATED 4/3/2024:
On
Windows 11
, when you no longer connect to a printer, the peripheral will remain available on the computer even if you remove it since the process doesn’t delete the driver. Print drivers will be kept on the computer if they are ever needed again.
Although this might be a great approach for reinstalling a printer without providing the controllers again, keeping them on the computer will only waste space on the hard drive. Also, if a problem occurs and the drivers get corrupted, it may cause other issues since the system will try to use drivers that don’t work.
However, if you no longer need or want to remove a corrupted print driver, Windows 11 provides a way to completely uninstall it from the computer.
This
guide
will teach you the steps to remove a printer driver from Windows 11.
Uninstall printer driver on Windows 11
Removing a printer and driver on Windows 11 is a two-step process. You first need to use the Settings app to uninstall the printer and then the Print Management app or PowerShell (depending on whether you use Windows 11 Pro or Home) to delete the driver package from the computer.
1. Remove printer in Settings
To remove a printer on Windows 11, use these steps:
Open
Settings
on Windows 11
Click on
Bluetooth & devices
.
Click the
Printers & scanners
page on the right side.
Select the printer to open its properties.

Click the
Remove
button.

Click the
Yes
button.
Once you complete the steps, you can delete the driver from Windows 11.
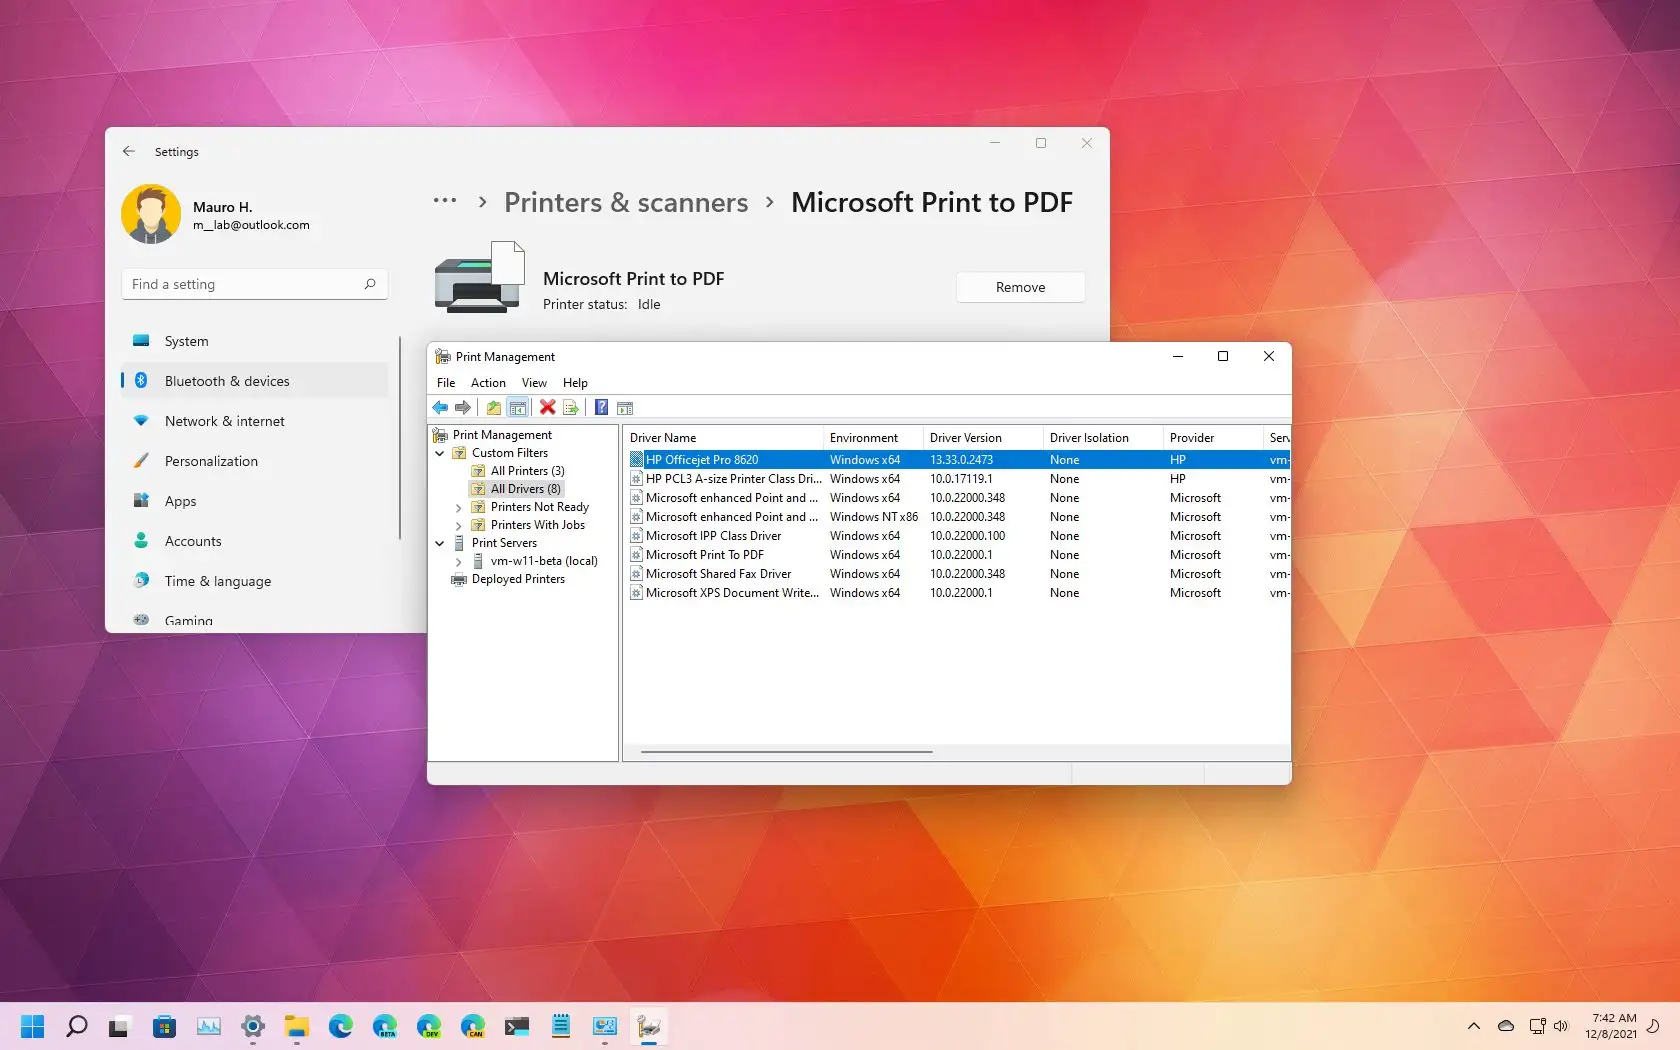
2. Delete printer driver in Print Management
To completely remove the printer driver from the device, use these steps:
Open
Start
.
Search for
Control Panel
and click the top result to open the console.
Click on
System and Security
.
Click on
Windows Tools
.

Double-click the
Print Management
option.
Expand the
Custom Filters
branch.
Click on
All Drivers
from the left navigation pane.
Right-click the printer driver on the right side and select the
Delete
option.

Click the
Yes
button.
After you complete the steps, the printer driver will no longer be available on the device. If you need to reinstall the peripherals, Windows 11 will need to download the driver again, or you will need to provide them manually.
I recently changed my printer to another brand, and I noticed that some printers may not use custom drivers. After removing the device from the Settings app, you may not find drivers from specific vendors. You don’t need to do anything else if this is the case.
3. Delete printer driver with PowerShell
If you use the Home edition of Windows 11, you won’t have access to the Print Management app, but you can still use PowerShell commands to uninstall the driver.
To remove a print driver with PowerShell, use these steps:
Open
Start
.
Search for
PowerShell
, right-click the top result, and select the
Run as administrator
option.
Type the following command to list all the print drivers installed on Windows 11 and press
Enter
:
Type the following command to remove the print driver and press
Enter
:
In the command, update the printer name with the name that appears in
step No. 3.
The quotation marks are required if the name includes spaces.
For example, this command removes the “HP Officejet Pro 8620” from Windows 11:

Once you complete the steps, the printer driver will be removed entirely from the system. You may need to repeat the steps to uninstall other printers.