-
To boot Windows 11 in System Restore, start the computer in WinRE, open
Advanced Startup
>
Troubleshoot
>
Advanced Options
>
System Restore
, click
“Next,”
select the restore point to recover the system, and click
“Finish.”
On Windows 11, you can use the System Restore feature from the
Windows Recovery Environment (WinRE)
to recover the installation when your computer has problems and won’t boot correctly, and in this guide, you will learn how.
System Restore comes disabled by default (for some odd reason), but when it’s enabled, it can create a copy of the system state as a “restore point” automatically during certain events (such as during system and driver updates) to protect the hard drive’s data. However, you can always
create restore points manually
.
In the event of a problem, you can use System Restore to recover
Windows 11
to the last good working state by applying one of the available restore points. Although you can use this feature from the system settings, if your computer isn’t starting correctly, you can boot into WinRE to access System Restore to undo changes and recover your Windows 11 installation.
This
guide
will teach you the steps to access System Restore from WinRE during boot on Windows 11.
Open System Restore to recover setup of Windows 11
To recover your Windows 11 installation from boot using a restore point, use these steps:
Press the power button.
Immediately after the Power-On Self-Test (POST), and you see the blue Windows logo, press the power button again to shut down.
Repeat steps
1
and
2
twice. In the third restart, Windows 11 should enter into the Windows Recovery Environment (Windows RE), where many diagnostics will be performed to fix any booting issues.

Click the
Advanced Options
button.
Click on
Troubleshoot
.
Click on
Advanced options
again.
Click the
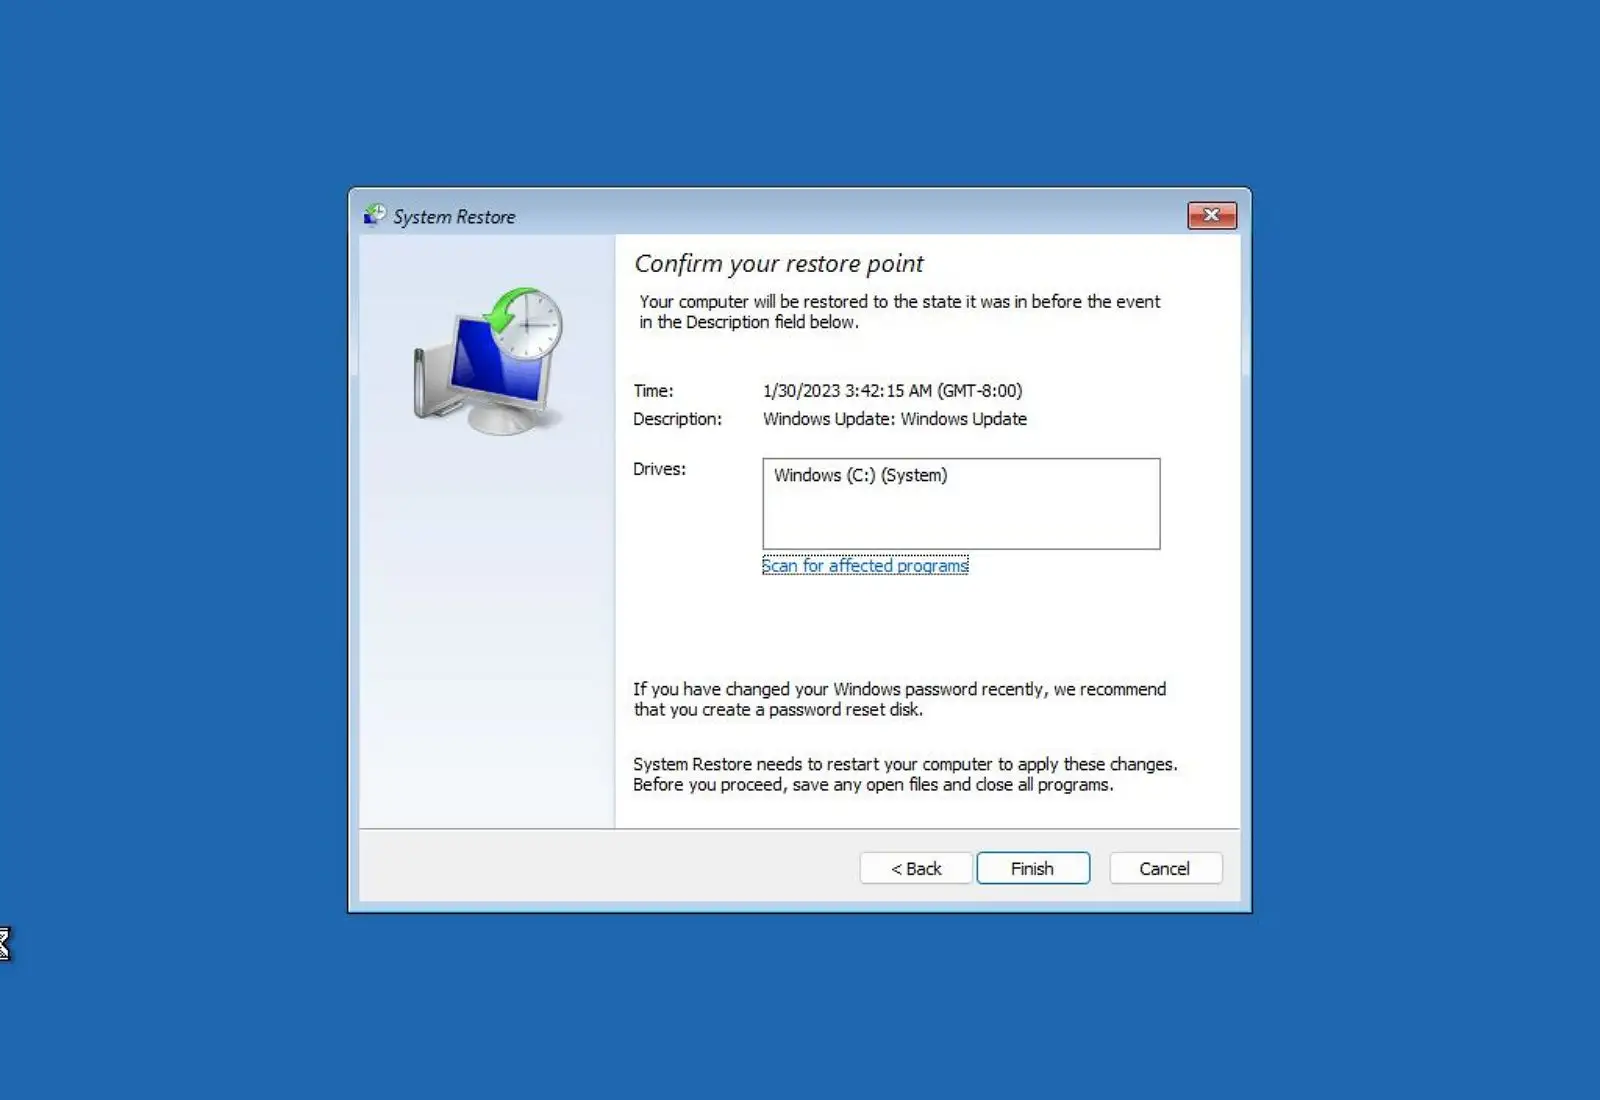
System Restore
option.

Click the
Next
button.
Select the restore point to recover your installation.

(Optional) Click the
“Scan for affected programs”
button.
Confirm the apps you may need to reinstall after applying the restore point.
Click the
Close
button.
Click the
Finish
button.
Once you complete the steps, the restore point will apply to fix the problem in question on Windows 11.
FAQ
No, the feature was not designed to delete your files during the process. However, it’s always a good idea to create a
file backup
before proceeding.
When a restore point is created, a snapshot of the current installation is taken. If you install a program or an update that causes problems, you can use a restore point to undo the changes to restore the computer to the state it was before the event.
Windows 11 comes with the feature disabled by default. You must
enable it manually
. Also, sometimes restore points won’t be created manually. As a result, it’s always recommended to
create restore points manually regularly
.