-
To change an account type to Administrator on Windows 11, open
Settings
>
Accounts
>
Other users
, select the account, click on
“Change account type,”
choose
“Administrator,”
and click
“OK.”
- You can also use Command Prompt and PowerShell commands.
If you have to change an account from “Standard User” to “Administrator,” you can complete this task from the Settings app, Command Prompt, or PowerShell, and in this guide, I will teach you how on
Windows 11
.
On Windows 11, you typically use one of the two account types, the “Administrator” or “Standard User.” The
Administrator
type belongs to the “Administrators” and “Users” groups, and it offers unrestricted access, meaning that users can change global settings, install apps, and run elevated commands.
The
Standard User
type belongs only to the “Users” group, which means limited access to the device. The user can still run applications and change settings, but they can’t change global settings, install apps, or run elevated commands.
Although it’s recommended that you use a Standard User account to work with Windows 11, sometimes you may have reasons to switch to an Administrator account. If you must change the account type, you can do this in at least three ways.
In this
guide
, I will teach you the steps to change the account type from Standard User to Administrator on Windows 11.
Change account type to administrator on Windows 11
On Windows 11, you can change the account type to make a user an administrator from the Settings app, PowerShell, or Command Prompt.
It’s important to note that you have to be signed in with a different administrator account to change the account type. You cannot change your standard account while you’re signed in to it.
Settings app method
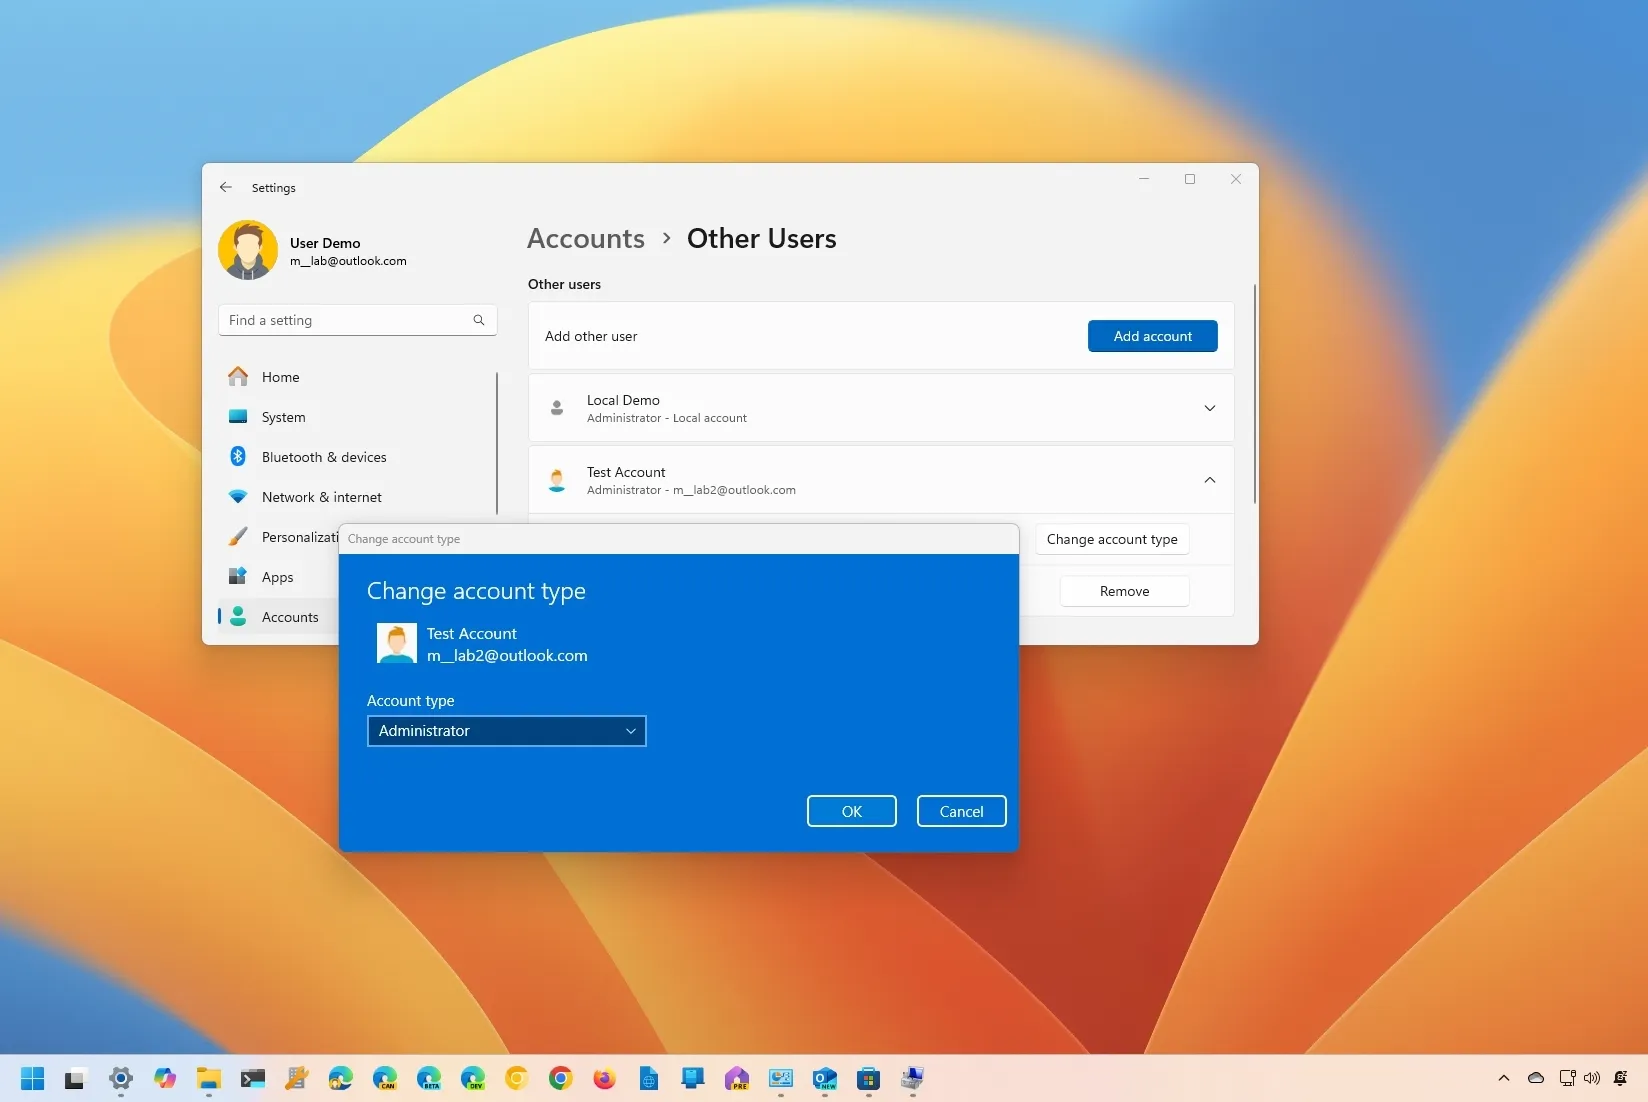
To change the account type to Administrator on Windows 11, use these steps:
Sign in (as admin) on Windows 11.
Open
Settings
.
Click on
Accounts
.
Click the
Other Users
tab.
Select the account under the “Other users” section and click the
“Change account type”
button.

Select the
Administrator
option.

Click the
OK
button.
Once you complete the steps, the account will have unrestricted access to change settings, install apps, and run elevated commands.
Command Prompt method
To make a user account administrator from Command Prompt, use these steps:
Open
Start
.
Search for
Command Prompt
, right-click the top result, and select the
Run administrator
option.
Sign in with an account that has administrator privileges.
Type the following command to list the available users and press
Enter
:
Type the following command to add the account to the Administrators group and press
Enter
:

After you complete the steps, sign out and sign back into the account to apply the changes. Then, start using the account as an administrator.
PowerShell method
Alternatively, you can also use PowerShell to make a Standard User account an Administrator. You can do this while you are signed in as a Standard User.
To change the account type to Administrator through PowerShell, use these steps:
Open
Start
.
Search for
PowerShell
, right-click the top result, and select the
Run as administrator
option.
Type the following command to list the available users and press
Enter
:
Type the following command to change the account type to “Administrator” and press
Enter
:

In the command, change the
“ACCOUNT-NAME”
with the name of the account. The quotation marks are only necessary if there is a space in the name.
Once you complete the steps, the Standard User account will become an Administrator account.
Update June 19, 2024:
This guide has been updated to ensure accuracy and reflect changes to the process.