-
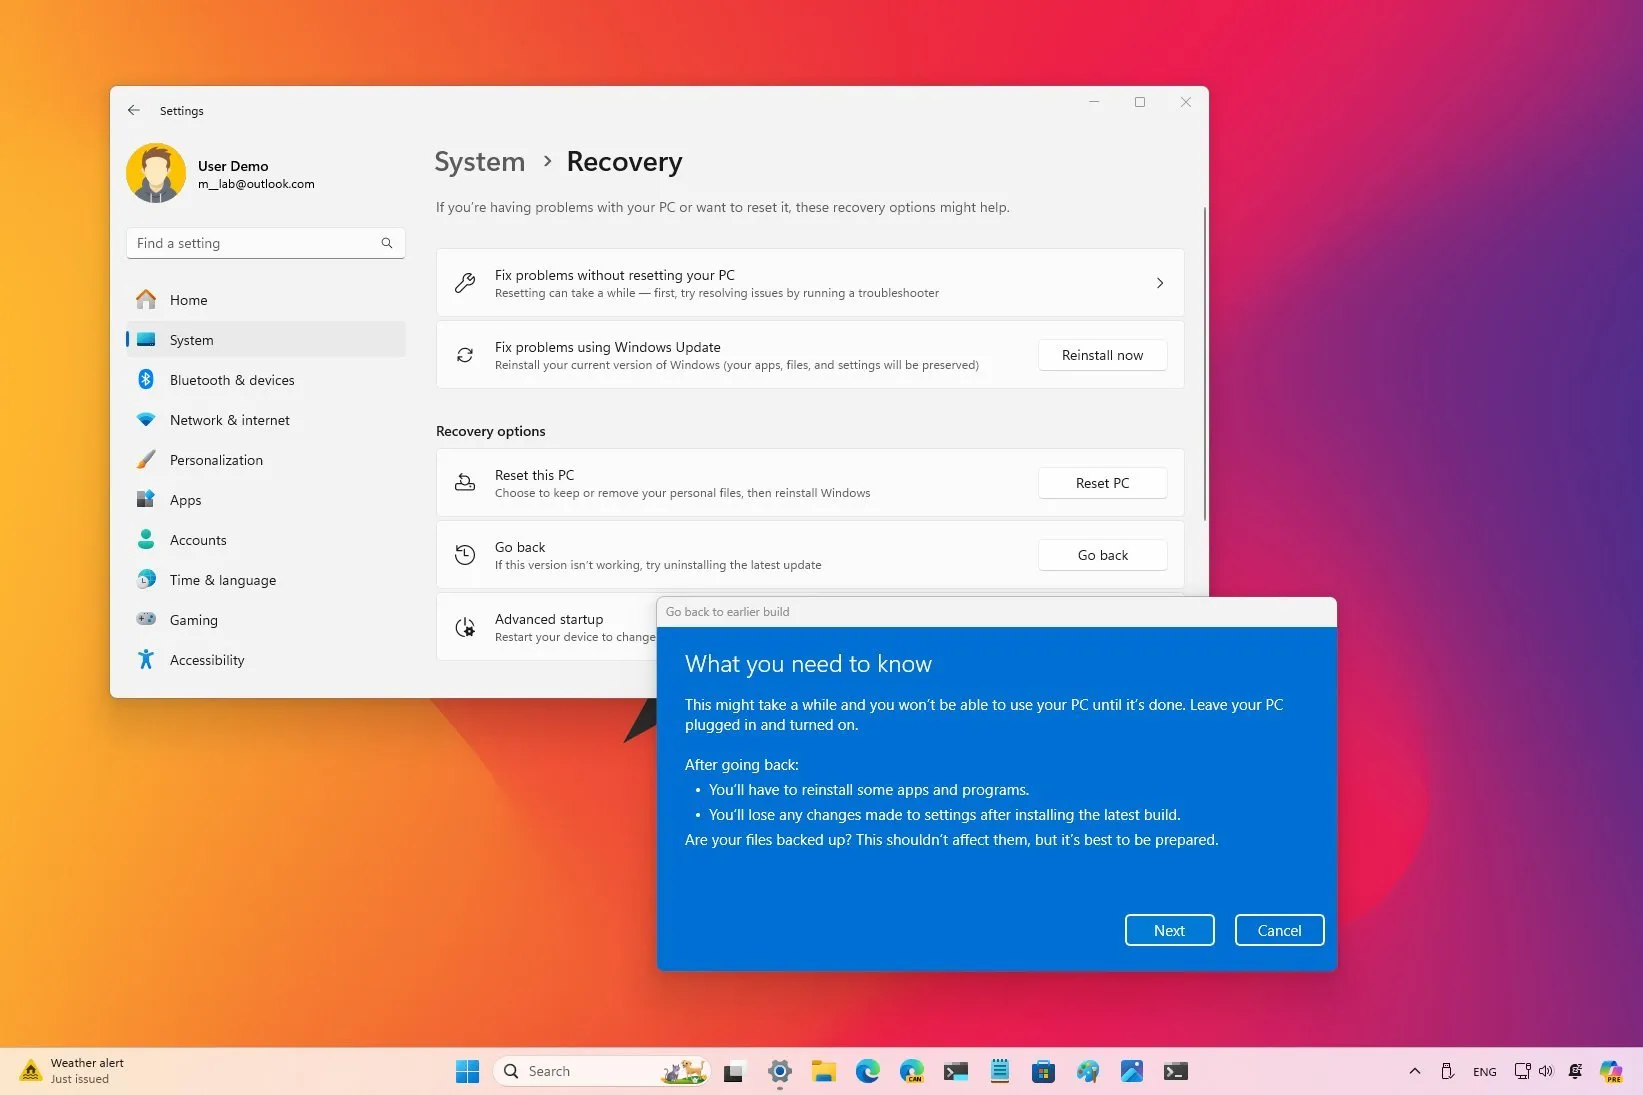
Open
Settings
>
System
>
Recovery
and click
Go Back.
Skip the update check, follow on-screen directions, and click
Go back to the early build
to roll back to Windows 11 23H2 from 24H2. -
To remove Windows 11 24H2 if your computer doesn t start, boot into WinRE and open
Troubleshoot
>
Advanced options
>
Uninstall Updates
>
Uninstall latest feature update
, click the
Uninstall feature update
button to roll back to Windows 11 23H2 or Windows 10.
After updating to Windows 11 24H2, you have two options for uninstalling the feature update and reverting to the previous version from the recovery settings if you experience errors, compatibility difficulties, performance problems, or unknown bugs.
You can uninstall version 24H2 using the Recovery settings if the computer still boots up properly and you can access the desktop. However, you can still use the Windows Recovery Environment (WinRe) to delete the feature update if the device is having boot issues and won’t start.
You can only go back to the prior version within the first 10 days following the upgrade, regardless of the method you choose. In order to make room for more of your stuff, Windows 11 will remove the files from the prior installation after this time.
Following the ten-day period, you have two options if you wish to downsize. You can use the earlier operating system version to clean install the system or restore it from a backup.
It’s crucial to remember that you could have to reinstall some apps after removing the Windows 11 2024 Update, and you might lose the settings you have set up when using the more recent version.
I’ll walk you through the process of reverting to Windows 10 or Windows 11 23H2 after updating to version 24H2 in this post.
-
Revert to a previous version from Windows 11 24H2
-
Roll back Windows 11 24H2 when your computer won t start
Revert to a previous version from Windows 11 24H2
Follow these instructions to uninstall Windows 11 24H2:
OpenSettings on Windows 11.
Select “System.”
On the right, click the Recovery page.
In the Recovery choices section, click the Go back button.

Press the “Next” button.
Press the “Thanks, no.” button.

Press the “Next” button.

Press the Next button once more.

Press the “Go” button.

The 24H2 update will be deleted from the computer after you finish the procedures, returning it to its former state while preserving your data, most of your settings, and your applications.
You will need to clean install Windows 11 or Windows 10 and restore the files from a backup if the recovery option indicates that it is no longer accessible on this PC message or if the Go button is grayed out.
Roll back Windows 11 24H2 when your computer doesn t start
When the PC doesn’t boot up properly, use these procedures to remove Windows 11 24H2:
Hit the power button.
Immediately following the Power-On Self-Test (POST), the blue Windows logo appears. To stop the computer from booting up and to shut it down, press and hold the power button once more.
Do steps 1 and 2 twice. (The operating system ought to launch the Windows Recovery Environment during the third restart.)

Press the button labeled “Advanced options.”

To troubleshoot, click on it.

On “Advanced options,” click.

On Uninstall Updates, click.

Select the option to uninstall the most recent feature update.

If applicable, log in with your administrator credentials.
To uninstall Windows 11 24H2, click the Uninstall feature update option.

The machine will remove the Windows 11 2024 Update and revert to the earlier version once you have finished the instructions. No more than ten minutes should be needed for the procedure.
The second half of 2024 is when the Windows 11 2024 Update (version 24H2) is expected to be released. On September 24, 2024, the new version will be made available to seekers for the first time. On October 8, 2024, it will be made an optional update for everyone.
Please leave a question in the comments section below if you run across any problems during this process.