-
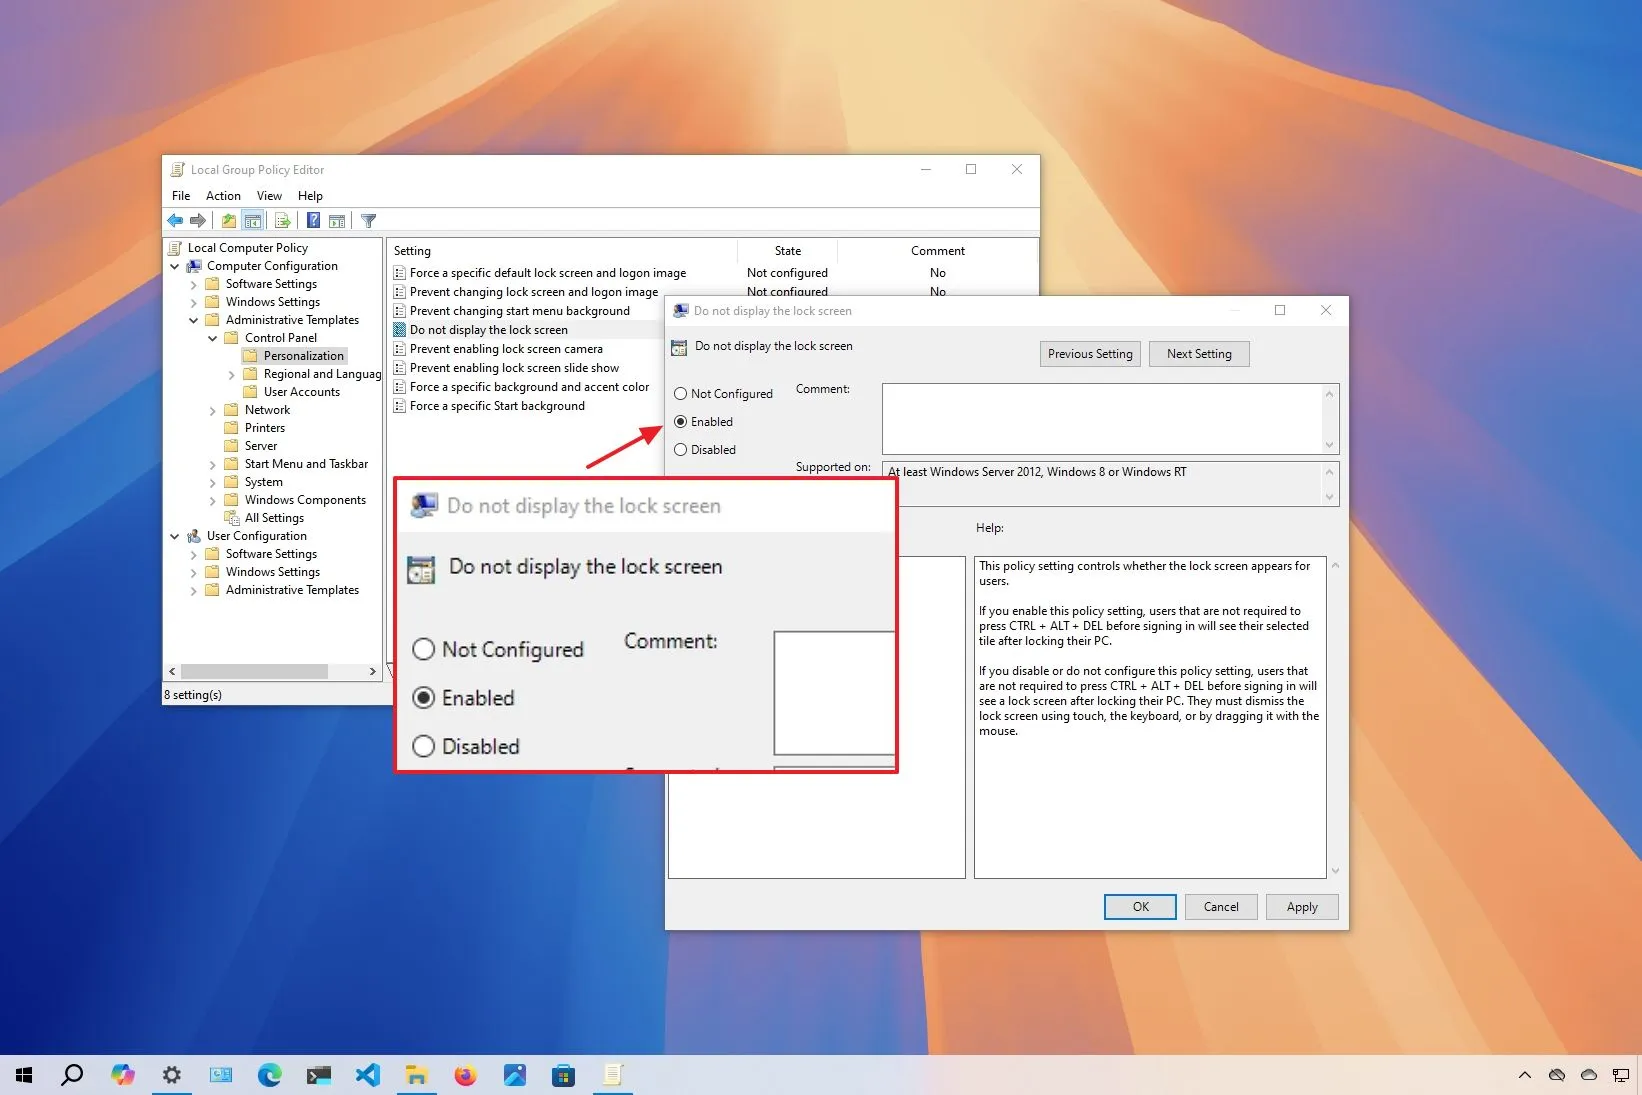
To disable the Windows 10 Lock Screen, open
Group Policy > Computer Configuration > Administrative Templates > Control Panel > Personalization
, open
Do not display the Lock Screen,
choose
Enabled,
apply the settings and restart the computer. -
You can also open the Registry, browse the
HKEY_LOCAL_MACHINE\SOFTWARE\Policies\Microsoft\Windows
path, create the
Personalization
key and the
Nolockscreen
DWORD and set the value to
1.
- Alternatively, you can disable the login password to bypass the Lock Screen on Windows 10.
UPDATED 9/17/2024: In this guide, I’ll walk you through how to disable the lock screen on Windows 10 in order to remove the additional step before logging in. The device’s lock screen, which appears as soon as it boots up, provides useful information (such the time, date, and weather, as well as app notifications) before you sign in. Additionally, it serves as a barrier to keep unwanted users from accessing your computer while you’re away. You must enter your login information to unlock your computer when it is locked. But it takes an additional step to get into your account.
There is no way to disable the Locks Screen feature in Windows 10 through the Settings app or Control Panel. Nevertheless, you can use the Registry or Group Policy Editor to turn off the feature. As an alternative, you can disable your account’s login password to get beyond the lock screen and start using your desktop.
It’s crucial to remember that turning off the lock screen might not be the best option for security reasons. Additionally, the device will become susceptible to both local and remote illegal access if your account password is removed. Use these instructions at your own risk if you intend to continue.
I’ll walk you through three methods in this guide to get rid of Windows 10’s lock screen. (Windows 11 can also be configured in the same way.)
-
Disable Windows 10 Lock Screen from Group Policy
-
Disable Windows 10 Lock Screen from Registry
-
Disable Windows 10 Lock Screen by disabling login password
Disable Windows 10 Lock Screen from Group Policy
Before logging in to your account, you can use the Local Group Policy Editor to disable the initial screen if you’re running Windows 10 Pro, Enterprise, or Education.
Follow these steps to disable Windows 10 Pro’s Lock Screen using Group Policy:
Launch Windows 10.
To launch the Local Group Policy Editor, search forgpedit and choose the top result.
Look through the path below:
Double-click the Lock Screen Policy “Do not display” button.

To make the lock screen inoperable, select the Enabled option.

Press the “Apply” button.
Press the “OK” button.
Restart the computer.
You will be sent straight to the sign-in screen the next time Windows 10 boots up after completing the steps.
Disable Windows 10 Lock Screen from Registry
The Local Group Policy Editor is not included in Windows 10 Home, but it can still be turned off by changing the Registry. This technique is compatible with Windows 10 Pro, Enterprise, and Education versions in addition to the Home edition.
Use these procedures to disable the lock screen via the registry:
LaunchStart.
To access the Registry, search for “regedit” and choose the top result.
Look through the path below:
Choose the Keyoption from the Newsubmenu that appears after right-clicking the Windowskey (folder).
Press Enter after naming the Personalization key.
Choose the DWORD option by right-clicking the Personalization folder, then selecting the Newsubmenu.

Press Enter after naming the key “Nolockscreen.”
To turn off the lock screen, double-click the Nolockscreen key and change its value data from 0 to 1.

Press the “OK” button.
Restart the computer.
When you restart your computer, Windows 10 will go directly to the sign-in screen instead of the lock screen.
Disable Windows 10 Lock Screen by disabling login password
You can also set up the system to log in automatically, avoiding the Lock Screen and Sign-in Screen, if you don’t want to change the Registry or don’t have access to the Group Policy Editor.
Follow these techniques to get rid of the login to get around Windows 10’s lock screen:
LaunchStart.
To access the old User Accounts settings, search for “netplwiza” and click the top result.
In the Users for this machine section, choose the account to have the password removed.
Unambiguous To use this computer option, the user needs to input their username and password.

Press the “Apply” button.
Verify the credentials for the Microsoft account.

Press the “OK” button.
Press the OK button one again.
The computer will instantly log in after you finish the instructions, eliminating the lock screen from the experience.
There are numerous additional methods available to you for removing the login password from your Windows 10 device.
Update September 17, 2024: To guarantee accuracy and take into account recent developments, this guide has been updated.