- Windows 11 now enables Device Encryption automatically during installation, starting with version 24H2.
- You can prevent the setup from turning on encryption by creating a custom USB bootable media with Rufus or modifying the Registry during installation.
- Alternatively, you can turn off the Device Encryption feature on Pro and Home editions from the Settings app after installation.
UPDATED 8/15/2024: Microsoft intends to use the Device Encryption feature to automatically enable encryption during the installation of Windows 11 24H2 for both the Pro and Home editions. There are a few ways to disable this security feature after setup or install the operating system without encryption if you would rather not use it.
A security feature called Device Encryption encrypts the whole system disk to safeguard your files. This guarantees that, even in the event that the device is misplaced or stolen, your data will be safe and unavailable to unauthorized users.
This feature on Windows 11 encrypts documents, photos, and any other type of data on the computer using the Advanced Encryption Standard (AES). It helps shield data from unwanted access by transforming it into a format that cannot be read without the right decryption key.
With version 24H2 (2024 Update), the corporation is easing the requirements to allow encryption on more devices. Previously, PCs had to meet either Modern Standby or Hardware Security Test Interface (HSTI) security requirements. Furthermore, untrusted Direct Memory Access (DMA) interfaces are not checked by the most recent operating system version.
Drive encryption is provided via BitLocker and Device Encryption, two security features. BitLocker is a fully functional encryption mechanism that is exclusive to Windows 11 Pro, Enterprise, and Education. This is the difference.
Device encryption, on the other hand, is a condensed form of BitLocker that works with Windows 11 Home and more recent devices running Windows 11 Pro or higher. It targets consumer devices with its basic encryption features. Additionally, only the installation and secondary drives are encrypted by this feature. External storage attached to the device is not encrypted.
Despite the fact that encryption is usually a good thing, there are still good reasons to turn it off. Although encryption no longer affects performance as much on newer technology, it might still be an issue on gaming PCs and devices with outdated hardware.
Compatibility is another factor I can mention because some peripherals or apps could not function properly on an encrypted drive. Additionally, if you have a dual-boot system, you can run into problems if you attempt to run Linux and Windows on the same machine.
Disabling encryption can also make things easier if you need to utilize data recovery tools that don’t support encrypted devices or move drives between systems regularly. Additionally, even though encryption keys are meant to protect data, they might cause irreversible data loss if they are lost.
I’ll go over how to stop Windows 11 from encrypting your device in this post, along with how to disable encryption once it’s installed.
-
Disable Device Encryption using Rufus
-
Disable Device Encryption during setup
-
Disable Device Encryption after installation
Disable Device Encryption using Rufus
Connect a USB flash drive with 8GB of free space, then follow these instructions to use Rufus to generate a bootable media of Windows 11 that removes encryption:
The OpenRufus website.
To download the most recent version, click the link in the Download section.
To start the utility, double-click the executable.
At the bottom of the page, click the Settings button (third button from the left).
Choose the Daily option from the Settings section’s Check for updates drop-down box.
Press the “Close” button.
Press the “Close” button one more.
Reopen Rufus.
(Optional) To produce the installation media, choose the USB flash drive from the drop-down box under the Device section.
Under the Boot selection area, choose the ISO image or disk option using the drop-down menu.
Choose the Download option by clicking the down-arrow button on the right.

Press the “Download” button.
Choose Windows 11.
On the “Continue” button, click.
Choose which version of Windows 11 you want to download.

On the “Continue” button, click.
Choose the Home/Pro/Edu version of Windows 11.
On the “Continue” button, click.
Choose the Windows 11 language.
On the “Continue” button, click.
Opt for the x64 architecture.
Press the “Download” button.
Choose where the ISO file will be automatically saved.
Under the Image choice setting, select the Standard Windows 11 Installation option.
(Selective) Once the download is complete, stick to the default settings.
(Optional) Under the Volume label setting, give the drive a name.
Press the “Start” button.
Delete every option (if required).
Verify the option to turn off BitLocker’s automated drive encryption.

Press the “OK” button.
After completing the procedures, you can install Windows 11 cleanly without automatic device encryption using the bootable disk.
Disable Device Encryption during setup
Use these procedures to turn off encryption while installing Windows 11 24H2:
Use the Windows 11 24H2 USB flash drive to boot up the computer.
To proceed, press any key.
Select the format and installation language.

Press the “Next” button.
Select the input method and keyboard.

Press the “Next” button.
Choose the option to install Windows 11.

Verify that I agree with everything.option to confirm this process will delete everything on the computer.
Click theI don t have a product keyoption.

Select the edition of Windows 11 your license key activates (if applicable).

Press the “Next” button.
Click theAcceptbutton
Select each partition on the hard drive where you want to install the operating system and click theDeletebutton. (Usually, Drive 0 is the drive that contains all the installation files.)

To install Windows 11, choose the hard drive (Drive 0 Unallocated Space).

Press the “Next” button.
On the Install button, click.

After the installation, use theShift + F10keyboard shortcut to access the first page of the out-of-the-box experience (OOBE).
Type theregeditcommand and pressEnterto open the Registry.
Browse to the following path in the Registry:
Right-click theBitLockerkey, chooseNew, and click theDWORD (32-bit) Valueoption.

Confirm thePreventDeviceEncryptionname for the DWORD value and press Enter.
Right-click the newly created key and choose theModifyoption.
Change the value from0to1.

Press the “OK” button.
Click theClose(X) button in the Registry app.
Click theClose(X) button in the Command Prompt app.
Continue with the on-screen directions tofinish the version 24H2 setup.
After you complete the steps, the installation of Windows 11 will not be encrypted with BitLocker.
Disable Device Encryption after installation
To disable Device Encryption after the Windows 11 installation, use these steps:
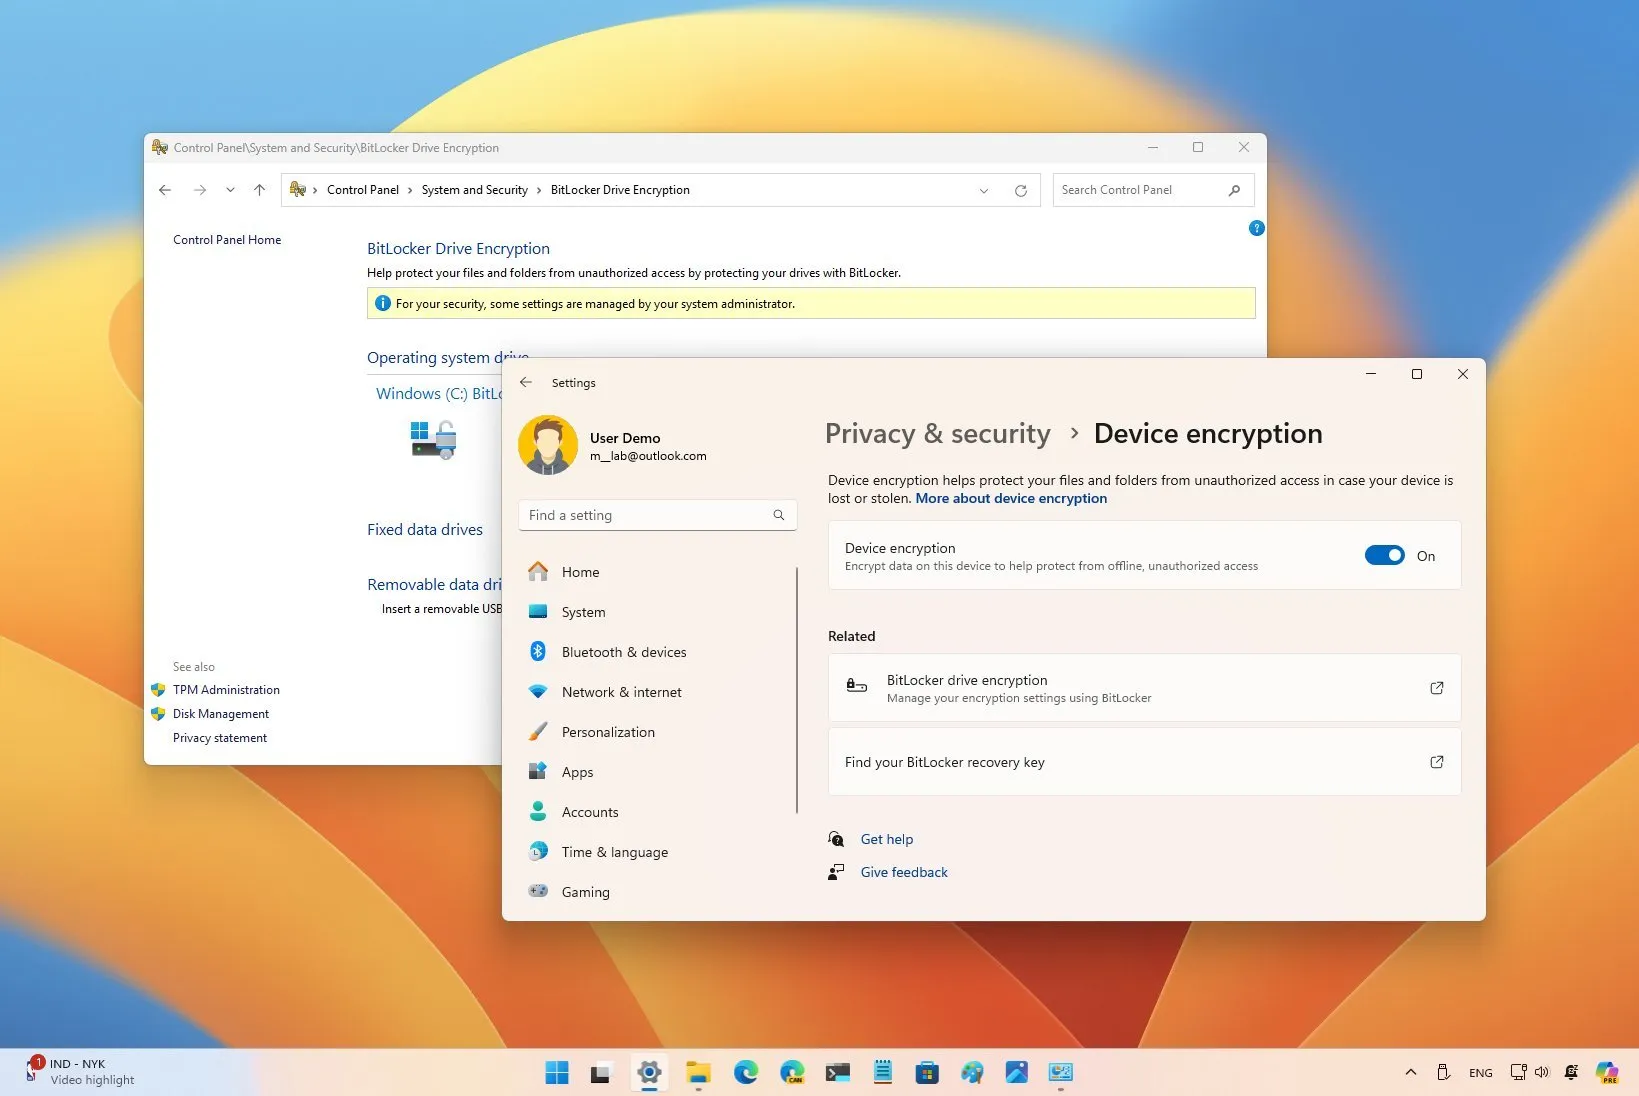
Open the settings.
Click on Security & Privacy.
Click theDevice Encryptionpage.
Turn off theDevice Encryptiontoggle switch.

Click theTurn offbutton.
Once you complete the steps, Windows 11 will disable encryption on your computer.
In the case that you want to use your computer with encryption, it s recommended toback up the BitLocker recovery keyas if the unexpected happens, you will have a way to recover.
It s important to note that many computer manufacturers have been encrypting devices by default for a long time, and the ability to use encryption during installation isn t new to Windows 11. However, starting with version 24H2, Microsoft will try to enforce the feature more, even when youreset your computer. However, the security feature won t turn on automatically when upgrading from an older version to 24H2.
Are you turning off encryption on your computer? Or do you have any questions?Let me know in the comments below.
Update August 15, 2024:This guide has been updated to ensure accuracy and reflect changes to the process.