-
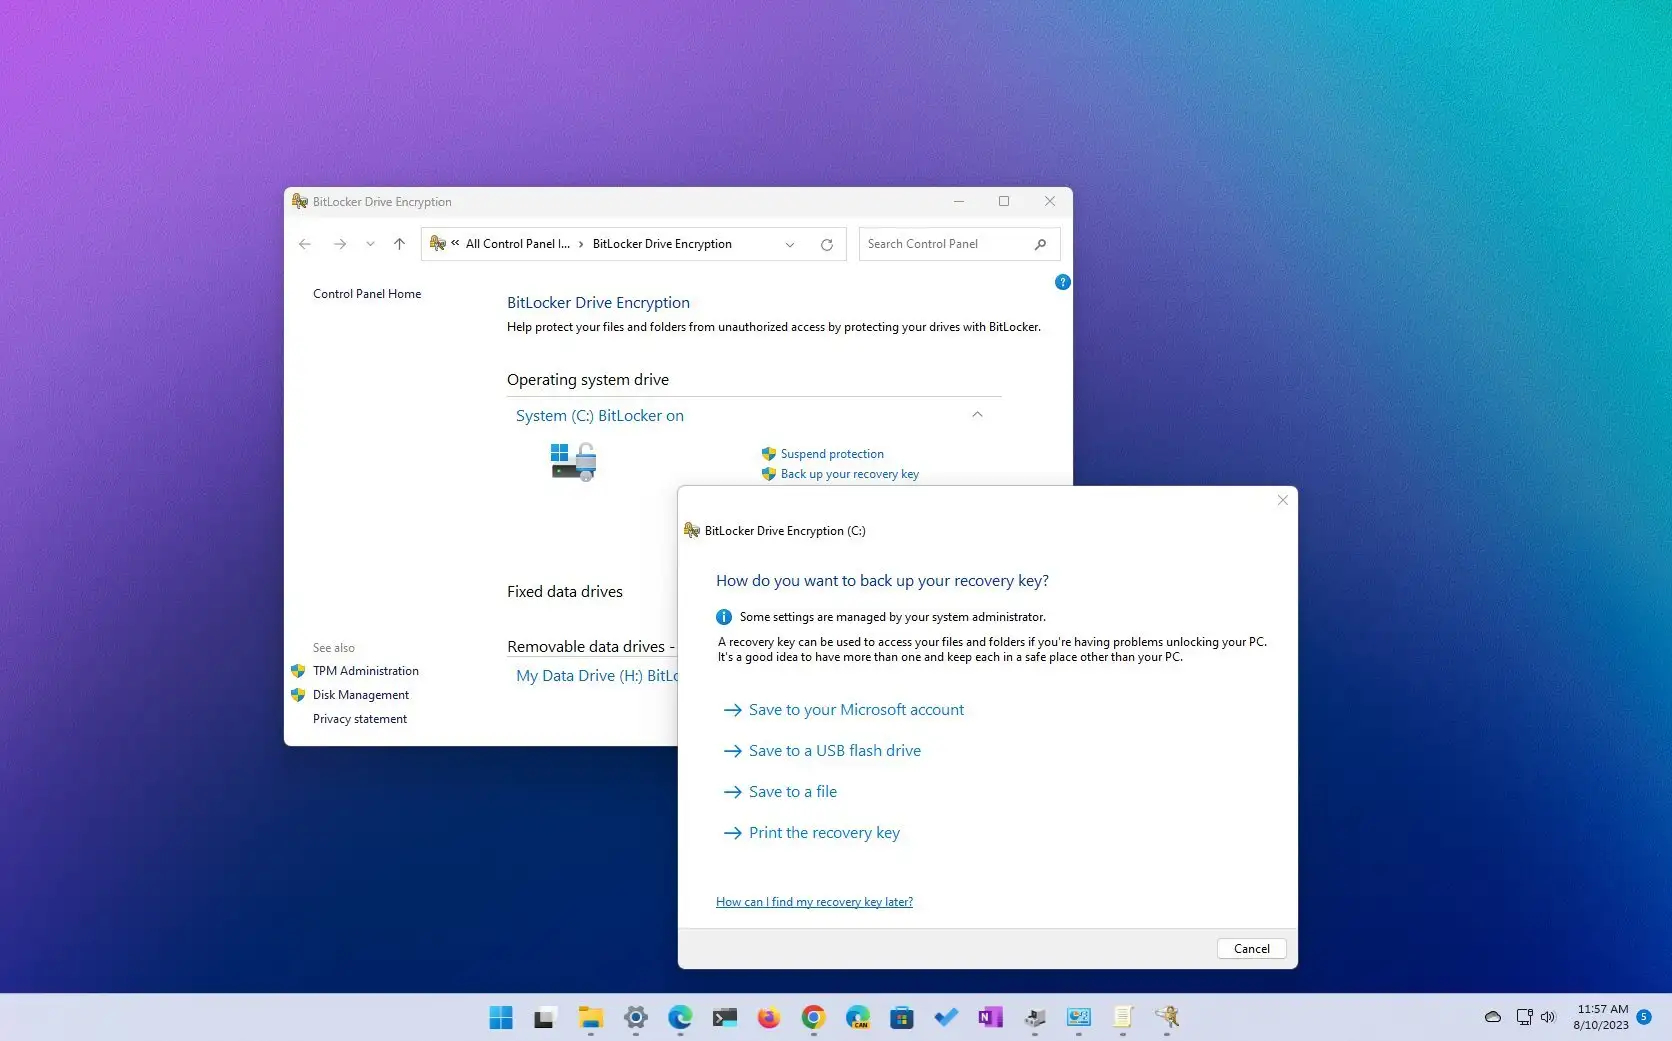
To backup your BitLocker recovery key on Windows 11, open
Settings
>
System
>
Storage
>
Advanced storage settings
>
Disks & volumes
, open the properties for the drive, click
Turn off BitLocker,
click
Back up your recovery key,
choose the backup option, such as a Microsoft account, USB flash drive, file, or print, and click
Finish.
UPDATED August 13, 2024: In this post, you will discover how and why to make a backup of the BitLocker recovery key on Windows 11. With Windows 11 Pro, Enterprise, and Education editions, you may utilize BitLocker, a security feature that enables you to encrypt a drive to prevent unwanted access to your documents, photos, and other data stored on the device.
Typically, BitLocker must be manually enabled. On laptops and tablets, Windows 11 may also activate the security feature automatically after a clean installation, and it may come pre-configured from the manufacturer. In these situations, you won’t have a backup of the recovery key. BitLocker’s security features make it convenient, but if something goes wrong with the system and you can’t access the drive, it can be a nightmare.
I recently set up a multi-installed laptop to access various Windows 11 versions from the Windows Insider Program’s available channels. However, when I turned the laptop on one day, I discovered that BitLocker needed your recovery key to unlock your driver because the Secure Boot policy had unexpectedly changed. But I didn’t even know the drive was encrypted. I searched through the recovery keys I had previously backed up, but I was unable to locate the one that would open the device. BitLocker is designed to safeguard the data on the drive, therefore using the recovery key to get around the encryption is (almost) impossible.
Since there were no personal files on the laptop, I made the decision to completely erase the system and begin anew. However, it’s always advised to check and backup the BitLocker recovery keys while you still have access to the system because unforeseen problems with your computer might always arise.
The procedures to backup your BitLocker recovery keys on Windows 11 will be outlined in this post.
Create BitLocker recovery key backup on Windows 11
Follow these instructions to create a backup of your BitLocker recovery key on Windows 11:
OpenSettings on Windows 11.
Select “System.”
On the Storage tab, click.
Select “Advanced storage settings” from the Storage management section.
Press the “Disks & volumessetting” button.

Select the hard drive containing the installation partition for Windows 11.
Click the C drive’s Properties button.

Select the option to turn off BitLocker.

Click the “Back up your recovery key” option under the “Operating system drive” section.

Select the BitLocker recovery key export option. Save to your Microsoft account, for instance.

If applicable, proceed with the on-screen instructions.
Press the “Finish.” button.
Following the procedures, the system will export the recovery key, which you can use to unlock the disk in the event of a computer failure or unforeseen modifications to the Secure Boot configuration.
These steps can also be found in my YouTube channel’s video guide. (Remember to subscribe and like.)
To have multiple recovery options, if at all possible, select an option, like saving the key to your Microsoft account, and then run the process again and choose an alternative, such exporting to a file or printing the recovery key.
Update August 13, 2024: To guarantee accuracy and take into account modifications to the procedure, this guide has been revised.