-
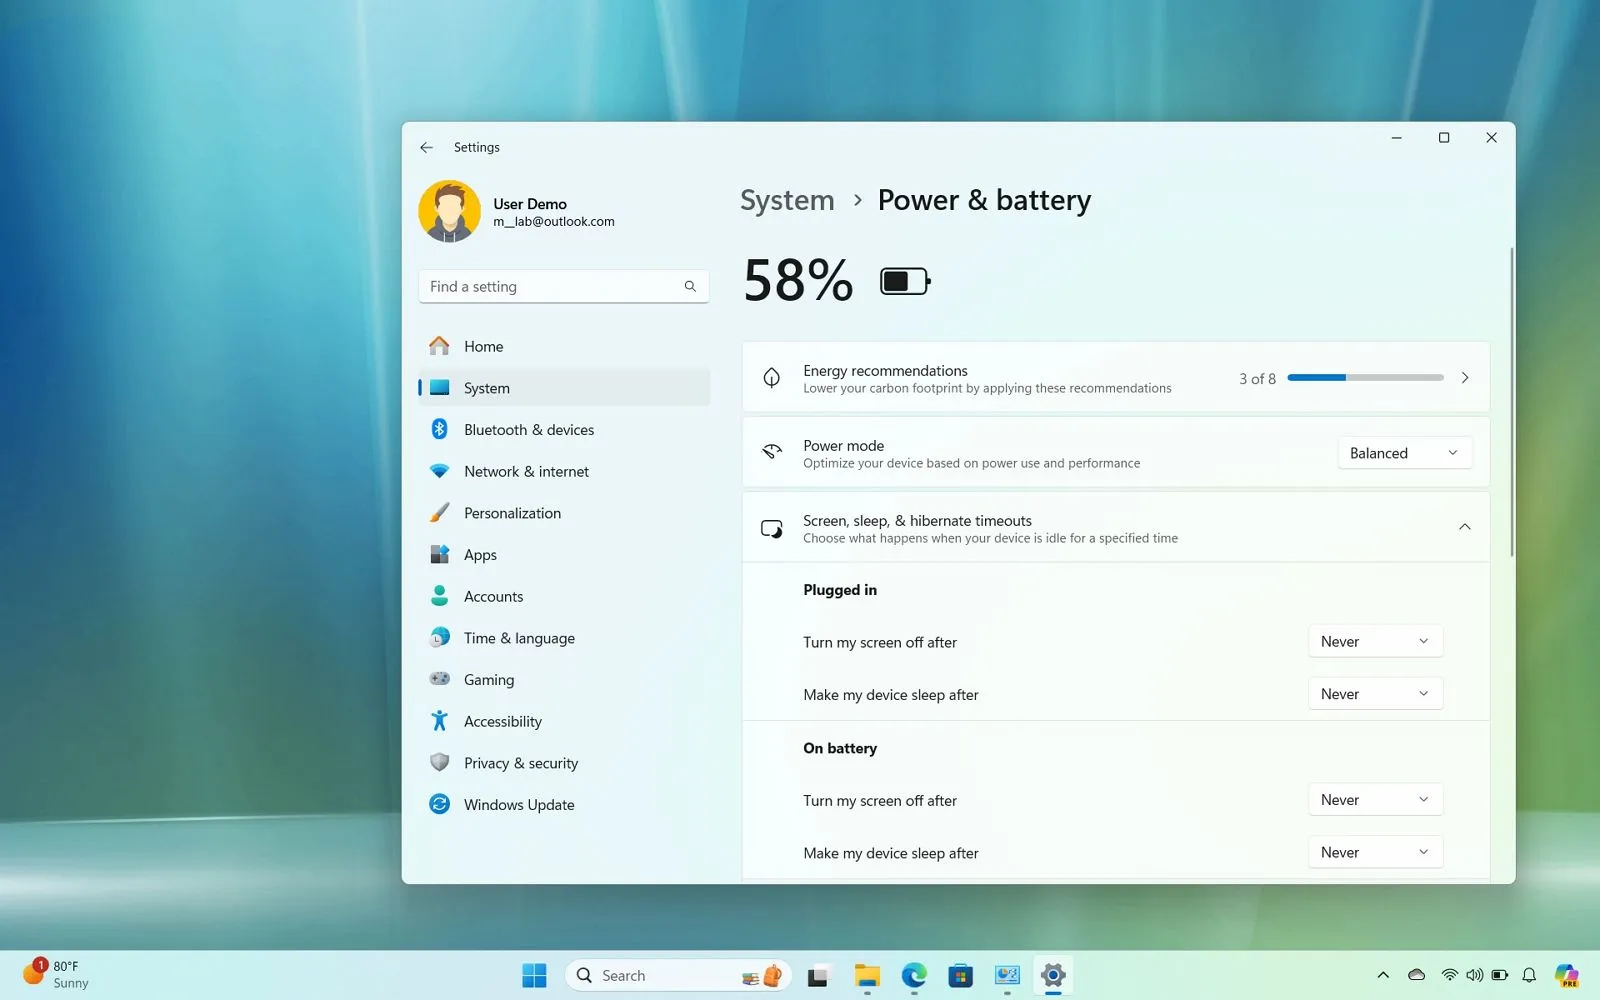
To change the Windows 11 sleep settings, open
Settings
>
System
>
Power & battery
, click the
“Screen and sleep”
settings, and choose when to turn off the display and when to put the computer to sleep. -
You can also disable the sleep settings by selecting the
“Never”
option.
Windows 11
has an option that automatically sends the device into sleep mode after some time of inactivity to
preserve energy and extend battery life
on laptops, and in this guide, you will learn the steps to customize the feature.
The power option has two settings, including one that puts the device into a low-power state (sleep) that shuts down the system but keeps the content running in memory, and the other option turns off the screen while keeping the computer running in the background.
Typically, the default settings are optimal for most users to save energy and carbon footprint while extending battery life. However, if you prefer to keep the device running longer or want to prevent it from entering the sleep low-power state mode, Windows 11 allows you to change the time for the screen and sleep.
In this
guide
, I will teach you how to change the sleep timeout to control when your laptop or desktop computer should enter sleep mode. I’ll also outline how to disable the feature to prevent the device from sleeping automatically.
-
Change sleep settings on Windows 11
-
Disable sleep timers on Windows 11
Change sleep settings on Windows 11
To change sleep settings on Windows 11, use these steps:
Open
Settings
on Windows 11.
Click on
System
.
Click the
Power & battery
tab.
Click the
“Screen and sleep”
(or
“Screen, sleep, & hibernate timeouts”
) setting under the “Power” section.
Choose how long the computer should wait before turning off the screen while plugged in or when running on battery.

Choose how long the computer should wait before going to sleep while plugged in or when running on battery.
Once you complete the steps, the computer will go into sleep mode or turn off the screen according to your configuration.
If you have a desktop computer, the Settings entry will appear as
“Power,”
and you will only find the settings to control the times when the device is plugged in.
Also, depending on the version of the operating system, the settings may be arranged differently. For example, these instructions show the design for
version 24H2
and higher releases, while on version 23H2, the settings are described as
“On battery power, turn off my screen after”
and
“When plugged in, turn off my screen after.”
If you want to conserve as much energy as possible, the default settings of 5 and 3 minutes for plugged-in and on battery are optimal for most people. However, you can always increase or decrease the values to fit your desired preferences. In this case, there’s not a wrong or right answer.
Disable sleep timers on Windows 11
To prevent the computer and screen from sleeping automatically on Windows 11, use these steps:
Open
Settings
.
Click on
System
.
Click the
Power & battery
tab.
Click the
“Screen and sleep”
(or
“Screen, sleep, & hibernate timeouts”
) setting under the “Power” section.
Choose the
Never
option to prevent the screen from turning off automatically for the “Plugged in” settings.

Choose the
Never
option to prevent the computer from going to sleep automatically for the “On battery” settings.
After completing the steps, the computer will stop automatically entering sleep mode, even if you are not actively working on the device. However, preventing the device from turning off the screen and entering sleep mode will result in higher energy usage.
Update July 16, 2024:
This guide has been updated to ensure accuracy and reflect changes to the process.