-
To change the wireless connection priority order on Windows 11 (or 10), open
Settings
>
Network & internet
>
Wi-Fi
, click on
Show available networks,
select the network, check
Connect automatically,
and complete the connection. -
You can also use the
netsh
command to change the Wi-Fi profile priority order with Command Prompt (or PowerShell).
To make sure the laptop always connects to the wireless network you have set up, you may adjust the priority order of Wi-Fi network connections on Windows 11 (and 10). I’ll walk you through the process in this post.
Windows will construct and save a wireless profile if you connect your laptop (or desktop computer) to multiple wireless networks during the initial connection. The network name, sometimes referred to as the SSID (Service Set Identifier), the password, and any variables necessary to establish the connection are typically included in the profile. Based on the priority ranking, the system will then automatically connect using this profile.
You can adjust the priority of each profile using the Settings app or Command Prompt to make sure your device always connects to the network of your choice when it is within range. This will help you avoid unintentionally connecting to unreliable networks.
I will describe the many methods for altering the wireless connection priority order in both Windows 10 and Windows 11 in this post.
-
Change wireless network priority on Windows 11
-
Change wireless network priority on Windows 10
-
Change wireless network priority from Command Prompt
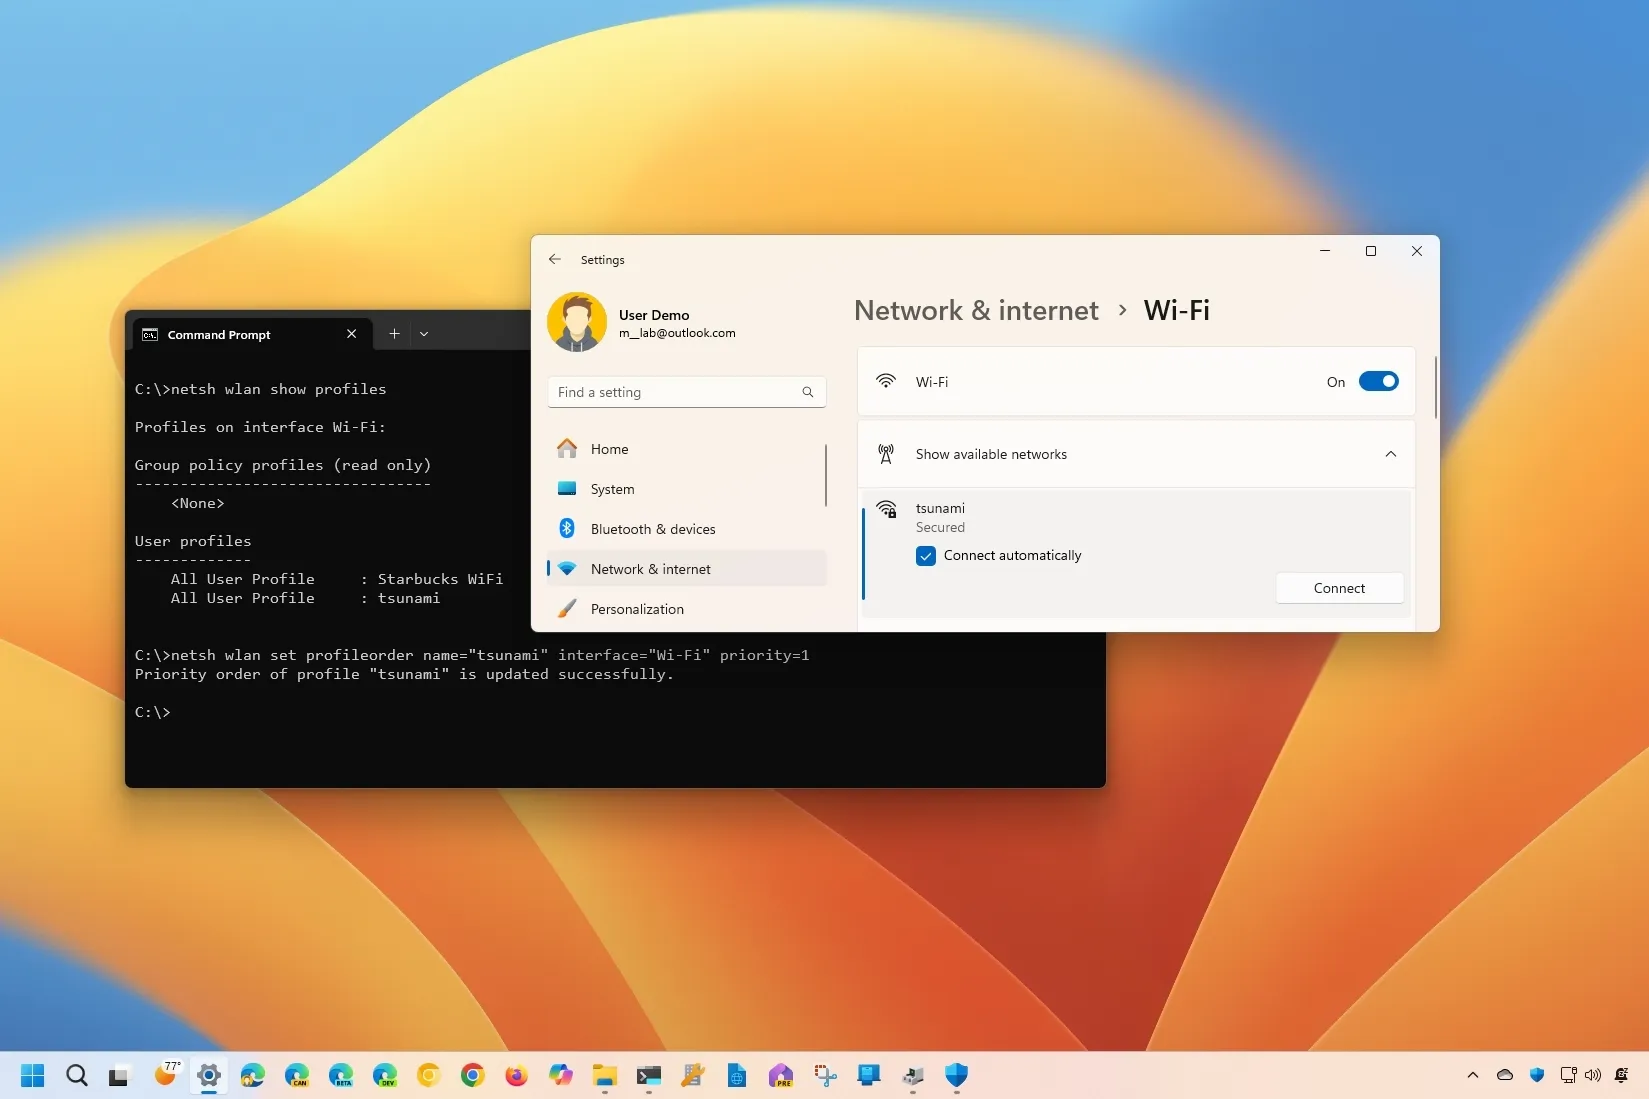
Change wireless network priority on Windows 11
In Windows 11, follow these procedures to modify a Wi-Fi profile’s priority order:
OpenSettings on Windows 11.
On Network & Internet, click.
Select the Wi-Fi page.
Select “Show available networks.”
Decide the wifi network you wish to prioritize.
To make the connection your primary priority, check the “Connect automatically” option.

Press the “Connect” button.
Verify the credentials for the wireless network.
Press the “Next” button.
The wireless connection will be at the top of the list until you set up another connection using the same choice after you finish the procedures.
I would only advise using the Connect automatically option on networks you connect to more frequently in various locations because doing so will alter the wireless priority. You can use Command Prompt to specify the priority order of which network the system should attempt to connect to first if you wish to configure the option on two or more networks that are typically within the range.
Change wireless network priority on Windows 10
Follow these instructions to modify the Wi-Fi connection priority in Windows 10:
Windows 10’s OpenSettings.
On Network & Internet, click.
Select Wi-Fi.
Select “Show available networks.”

Decide the wifi network you wish to prioritize.
To make the connection your primary priority, check the “Connect automatically” option.

Press the “Connect” button.
Verify the credentials for the wireless network.
Press the “Next” button.
The Wi-Fi profile will be given the highest priority order and moved to the top of the list once you have finished the steps.
Change wireless network priority from Command Prompt
Use the following procedures to modify a Wi-Fi connection’s priority order in Windows 11 or 10 using the Command Prompt (or PowerShell):
LaunchStart.
Run as administrator by right-clicking the top result after searching for Command Prompt (PowerShellorTerminal).
To see the saved wifi profiles, use the following command and hit Enter:
Verify the profile names and wireless interface.
To modify the Wi-Fi profile priority, type the following command and hit Enter:
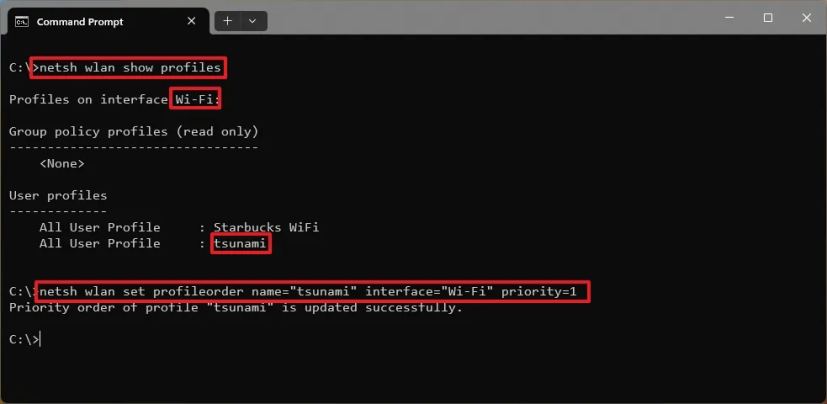
Change 1 for the desired priority number after updating WIFI-PROFILE and INTERFACE-NAME with your computer’s details. Since I have two networks saved on the computer in this instance, number 1 would establish the wireless network as the top priority and number 2 would set a lower priority.
The wireless profiles will have a new priority order when you finish the steps.
Older operating systems, such as Windows 8.1 and 7, should also be able to follow the Command Prompt (or PowerShell) instructions.