ASUS is testing a BIOS (UEFI) update for its AMD 600 and Intel 700 series motherboards that brings support for
Dynamic Lighting on Windows 11
. Dynamic Lighting allows you to control the RGB lighting of computer components and accessories from the Settings app without the need for third-party tools.
Microsoft created this feature to resolve (or minimize) the fragmentation of proprietary software you have to install to control different LED lighting, such as those available on mice, desk mats, keyboards, monitors, motherboards, graphics cards, and countless others.
The update that ASUS is testing adds a new “Windows Dynamic Lighting” option in the “Advanced Mode” page for the “UEFI BIOS Utility” experience for AMD and Intel boards. Once enabled, the motherboard will appear as a customizable component from the “Dynamic Lighting” settings page.
In this
guide
, I will outline the steps to update the BISO for ASUS AMD 600 and Intel 700 series motherboards to the beta version. I’m also including the steps to access the firmware experience to enable the feature and the steps to configure Dynamic Lighting on Windows 11.
Enable Dynamic Lighting on ASUS UEFI (BIOS)
To use the Dynamic Lighting feature on Windows 11 with ASUS motherboards, you have to download and install the latest UEFI BIOS update, access the firmware advanced mode to enable the feature, and then, you have to change the lighting effects and brightness from the Settings app.
1. Download ASUS BIOS beta update
To download the beta version of the ASUS BIOS, use these steps:
Open the ASUS forum page for
AMD 600
or
Intel 700
series motherboard.
Click on the link for the beta version of the BIOS update for
your
motherboard.

Click the
Download
button to save the file to your computer.

Connect a USB flash drive to your computer.
Open
File Explorer
.
Open
This PC
.
Right-click the USB flash drive and select the
Format
option.
Choose the
FAT32
option for the “File System” setting.

Click the
Start
button.
Click the
OK
button to confirm.
Open the folder location containing the ASUS BIOS update file.
Right-click the file and choose the
Extract All
option.
Click the
Extract
button.

Right-click the
“.CAP”
file and select the
Copy
option.

Open the recently formatted USB flash drive.
Click the
Paste
button from the command bar.
Once you complete these steps, you can proceed to apply the beta version of the update for your motherboard.
2. Install ASUS BIOS beta update
To install a BIOS update on your ASUS computer, use these steps:
Open
Settings
.
Click on
System
.
Click the
Recovery
page.
Click the
Restart now
button for the “Advanced startup” setting.

Click the
Restart now
button again.
Click on
Troubleshoot
.
Click on
Advanced options
.
Click the
UEFI Firmware settings
option.

Click the
Restart
button.
Press the
F7
key to access the ASUS BIOS advanced mode.
Click the
Tools
tab.
Click on
ASUS EZ Flash
. (The name of the tool may be slightly different.)

Select the
BIOS
file on the USB flash drive.
Choose the update file.
Click the
Yes
button.
Click the
Yes
button again.
Click the
Yes
button one more time to proceed with the update.
After you complete the steps, don’t touch anything, don’t move the mouse, or mess around with the computer. Just let the process do its thing. This process could take a long time. Also, the device will restart a bunch of times, so don’t do anything until the computer is back into the BIOS or loads Windows.
Once the update is complete, you can proceed with the steps to enable the feature to control the motherboard lighting from Windows 11 without
the Armoury Create software
.
3. Enable Dynamic Lighting in UEFI
To enable Windows Dynamic Lighting on ASUS motherboards, use these steps:
Open
Settings
.
Click on
System
.
Click the
Recovery
page.
Click the
Restart now
button for the “Advanced startup” setting.
Click the
Restart now
button again.
Click on
Troubleshoot
.
Click on
Advanced options
.
Click the
UEFI Firmware settings
option.
Click the
Restart
button.
Press the
F7
key to access the ASUS BIOS advanced mode.
Click the
Advanced
tab.
Choose the
Enabled
option for the “Windows Dynamic Lighting” setting under the “LED lighting” section.
Click the
Exit
tab.
Save the
BIOS
settings and restart the computer.
Once you complete the steps, the computer will reboot, and you can proceed to enable and configure Dynamic Lighting.
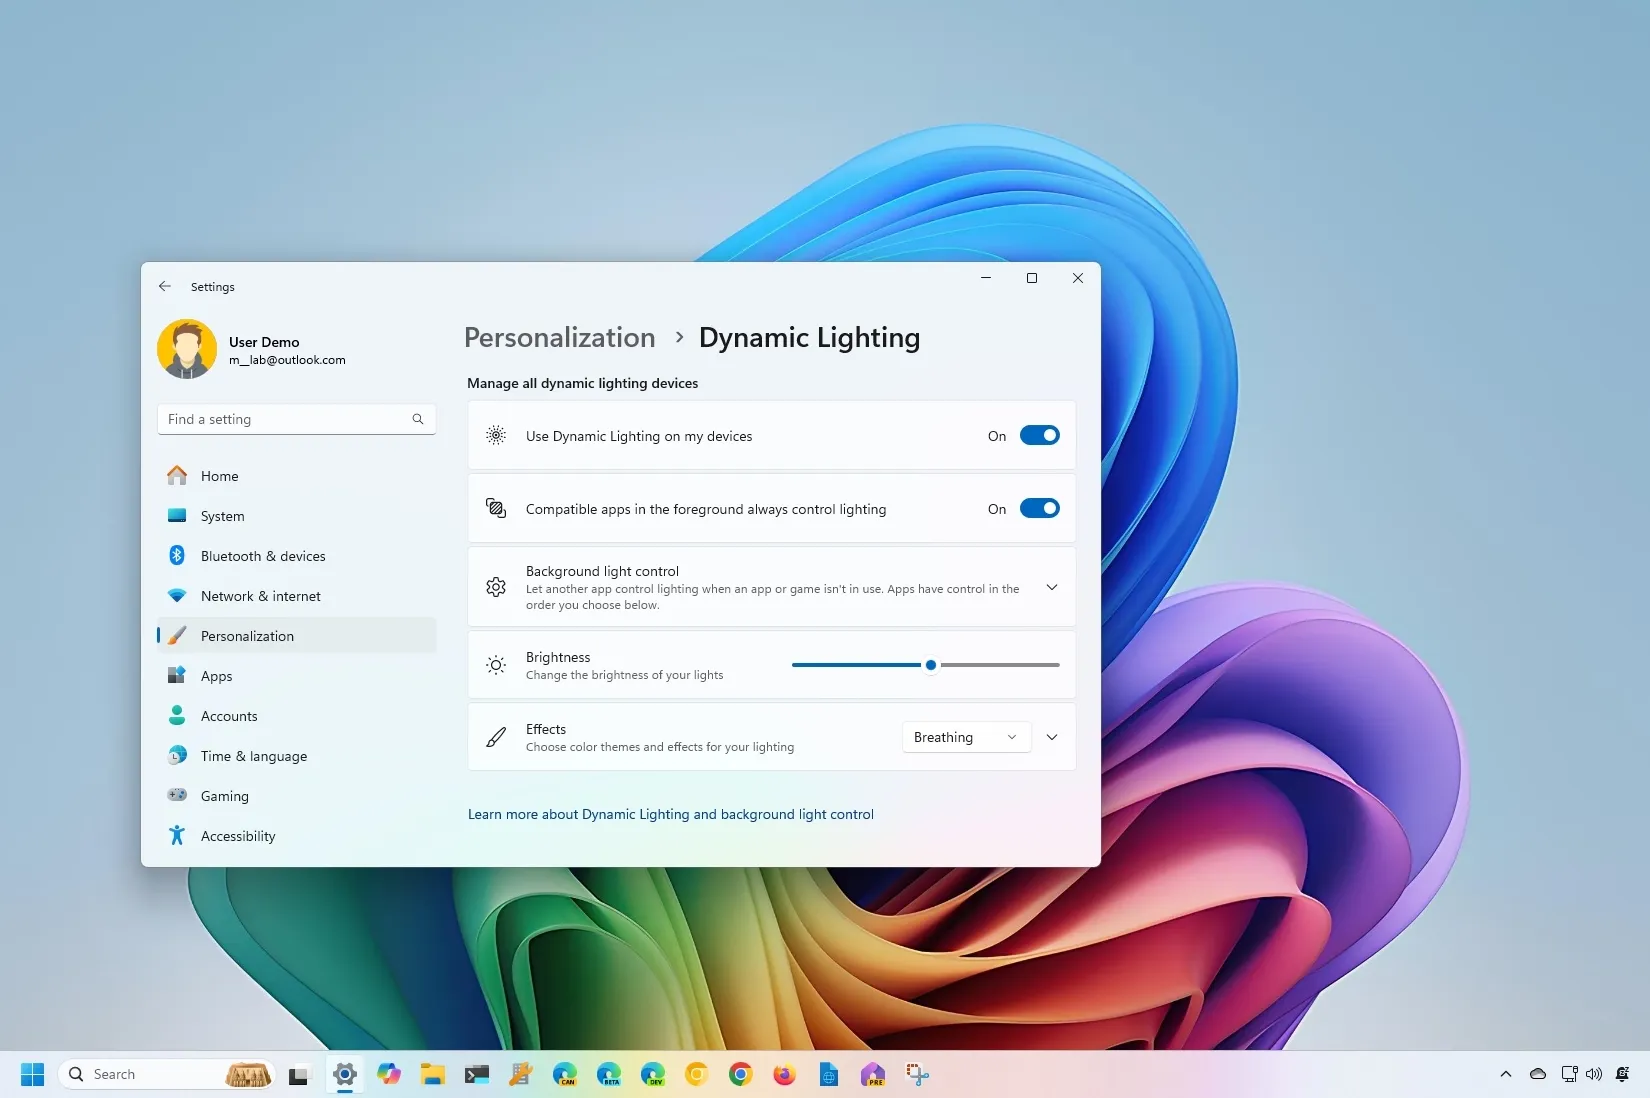
4. Configure Dynamic Lighting on Windows 11
To configure Dynamic Lighting for ASUS AMD 600 and Intel 700 series boards, use these steps:
Open
Settings
.
Click on
Personalization
.
Click the
Dynamic Lighting
tab.
Confirm the compatible RGB devices connected to your computer.
Turn on the
“Use Dynamic Lighting on my devices”
toggle switch to enable the RGB controls (if applicable).

(Option 1) Click on the ASUS icon in the Dynamic Lighting-compatible devices list to configure the brightness, color, and effects for the motherboard only.
(Option 2) Configure the main page’s brightness levels, colors, and effects to configure the settings globally.

After completing the steps, the motherboard will display the effects with the selected brightness level.
Although I’m focusing this guide on ASUS motherboards, ASRock is another company that has been pushing updates for its Intel 600/700 series, AMD AM4 B550/X570, and AM5 X670/B650/A620 motherboards to support Dynamic Lighting since 2023.