-
To add multiple share names to the same folder on Windows 11 (or 10), open the shared folder
“Properties”
settings, click
“Advanced Sharing,”
configure share permission for the original folder name, click
“Add,”
confirm the new name for share, continue configuring permissions, and apply the settings.
On
Windows 11
and 10, you can
share files on your computer
or server with network users. Although it is possible to share the same data with different permissions for different users, you can also share the same folder with multiple names and custom settings.
This option will come in handy in many situations. For instance, if you have a leading accountant who needs to view and modify documents, and then you have two interns who only need to view the documents. In this case, you can share the same folder as “AccountingManager” and “AccountingInterns” with different permissions, network paths, and settings.
In addition, the ability to add and remove share names allows you to change the name of the share without having to modify the local folder in any way.
In this
guide
, I will outline the steps to share a folder in the network with multiple names and different permissions on
Windows 10
as well as on Windows 11.
Create a network share with multiple names and permissions
To share the same folder with different names and permissions on Windows 10, use these steps:
Open
File Explorer
on Windows.
Open the folder you want to share.
Right-click the folder and select the
Properties
option.
Click the
Sharing
tab.
Click the
Advanced Sharing
button.

Check the
“Share this folder”
option.
Confirm a name share name under the “Settings” section.

Click the
Permissions
button.
Select the
Everyone
object.
Click the
Remove
button.

Click the
Add
button.
Confirm the name of the user or group that you intend to share the folder.

Click the
OK
button.
Select the recently added user or group.
Select the permissions for the user or group you selected.

Click the
Apply
button.
Click the
OK
button.
Click the
Apply
button (important).

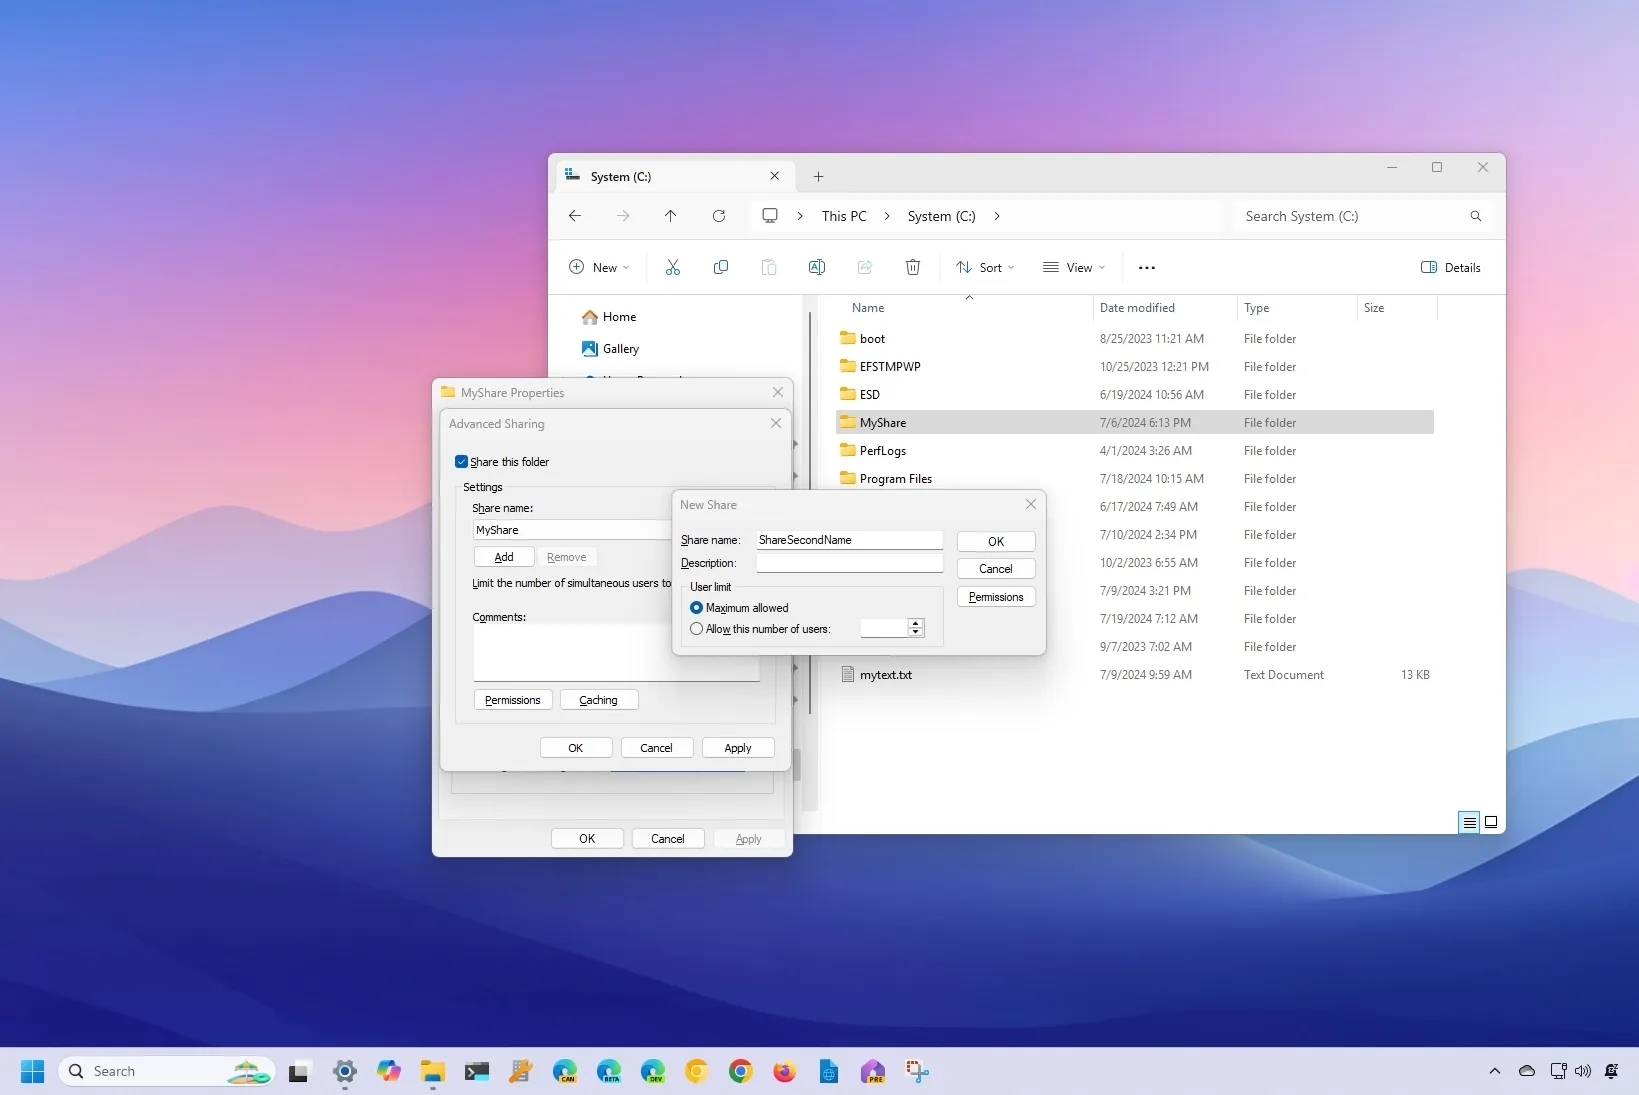
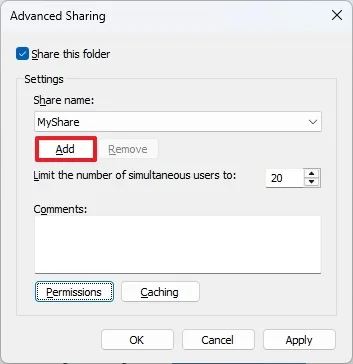
Click the
Add
button to share the same folder with a different name and permissions under the “Settings” section.
Confirm a new name for the shared folder.

Click the
Permissions
button.
Select the
Everyone
object.
Click the
Remove
button.

Click the
Add
button.
Confirm the name of the user or group that you intend to share the folder.

Click the
OK
button.
Select the recently added user or group.
Select the permissions for the user or group you selected.
Click the
Apply
button.
Click the
OK
button.
Click the
OK
button again.
Click the
Apply
button again.
Click the
OK
button again.
Click the
Close
button.
Once you complete the steps, you will end up with one shared folder that will appear as separate folders (
//10.1.2.10/MyShare
and
//10.1.2.10/SecondShareName
) with different permissions.
This guide shares a folder with two names, but you can add more names and permissions. Also, this guide focuses on Windows 11 and 10, but you can use these instructions on Windows 8.1 and Windows 7.
Update July 19, 2024:
This guide has been updated to ensure accuracy and reflect changes to the process.