GParted is a free, open-source, fully-featured tool based on Linux designed to manage disk partitions. Using this tool, you can create, delete, copy, resize, move, or label partitions with different file systems, such as NTFS, btrfs, ext2/3/4, f2fs, FAT16/32, hfs/hfs+, linux-swap, luks, lvm2 pv, nilfs2, reiserfs/4, udf, ufs, and xfs.
Although
Windows 11
and 10 include the Disk Management tool to manage partitions, if you plan to resize a drive to create a dual-boot setup, expand an existing partition, or create or delete a partition, you can also use GParted, which offers more tools and options.
This
guide
will teach you how to resize, create, and delete partitions using GParted on Windows 11 and 10 devices.
-
Create a USB bootable media with GParted
-
Resize drive partition using GParted
-
Create drive partition using GParted
-
Delete drive partition using GParted
Create a USB bootable media with GParted
To create a GParted bootable media, connect a USB flash drive with at least 2GB of space to your device, and use these steps:
Download
tuxboot
from SourceForge
. (Select the latest stable version available.)
Double-click the
tuxboot-x.x.x.exe
file.
Click the
Yes
button to bypass the “unknown publisher” warning.
Select the
“On-Line Distribution”
option.
Use the drop-down menu and select the
gparted-live-stable
option.
Use the “Type” drop-down menu and select the
USB Drive
option.
Use the “Drive” drop-down menu and select the flash drive.

Click the
OK
button.
Once you complete the steps, tuxboot will create a bootable media with the GParted files, which you can use to boot your computer to use GParted. However, before you start your device with the tool, you need to make sure that your device can boot from USB.
Typically, you’ll need to access your device Basic Input/Output System (BIOS) or Unified Extensible Firmware Interface (UEFI) by hitting one of the function keys (F1, F2, F3, F10, or F12), the ESC, or the Delete key during boot.
Once inside the first, look for the Boot section and make sure the boot order is set to the drive that contains the Windows 11 installation files, and do not forget to save the configuration.
The BIOS/UEFI can vary depending on the manufacturer and even per computer model. As such, make sure to check your manufacturer support website for more specific instructions.
Resize drive partition using GParted
To use GParted to resize a drive with a Windows 11 or Windows 10 installation, connect the USB flash drive with GParted to your device, and then use these steps:
Start your computer with the GParted USB drive.
Select the
“GParted Live (Default settings)”
option and press
Enter.

Select the
“Don’t touch keymap”
option and press
Enter
.

Select your language and press
Enter
.

Select
0
and press
Enter
.

Use the drop-down menu in the top-right corner to select the drive you want to resize.

Select the partition you want to shrink or extend, and click the
Resize/Move
button.
Using the available options, carefully select the new size for the existing partition. (You can also use the slider at the top to set the new parameters.)

Click the
Resize/Move
button.
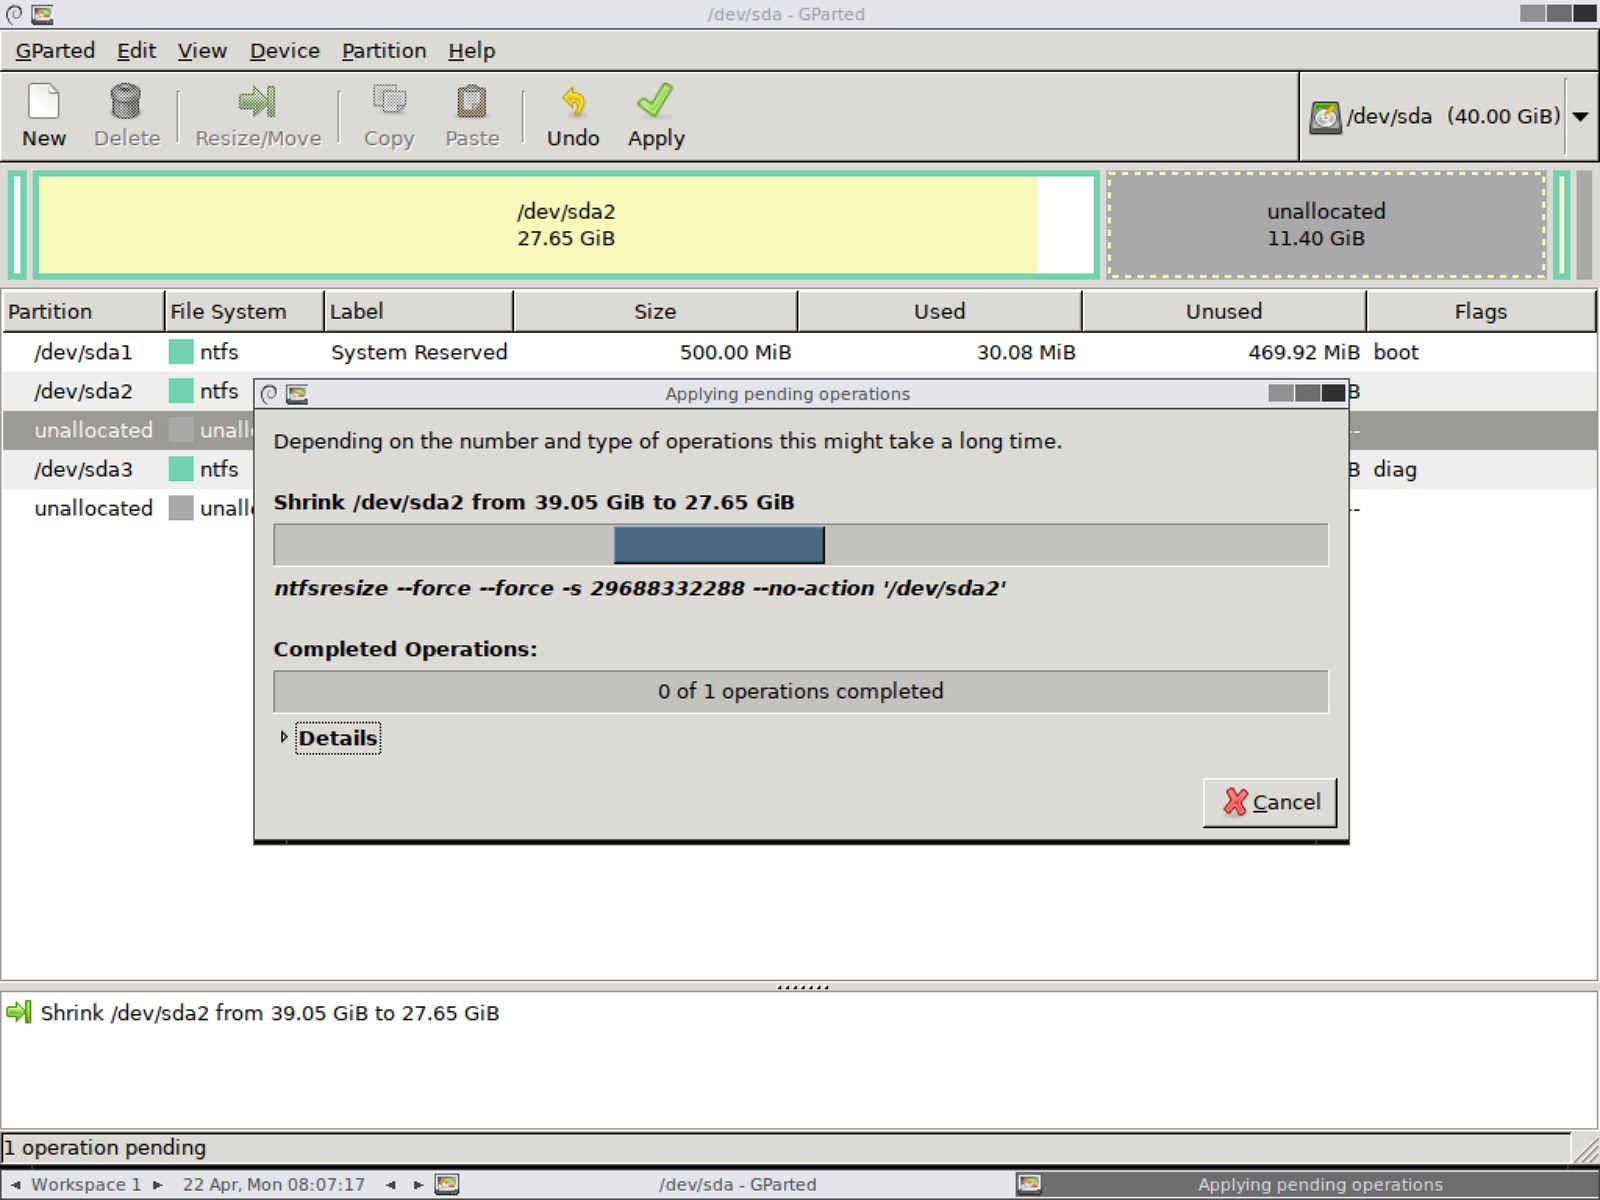
Click the
Apply
button.

Click the
Yes
button.
Click the
Close
button.
Once you complete the steps, the Linux-based tool will resize the partition on your selected drive.
Create drive partition using GParted
You can also use GParted to create and format new partitions using unallocated space with these steps:
Start your computer with the GParted USB drive.
Select the
“GParted Live (Default settings)”
option and press
Enter.
Select the
“Don’t touch keymap”
option and press
Enter
.
Select your language and press
Enter
.
Select
0
and press
Enter
.
Select the
Unallocated
space on the empty drive.
Click the
New
button in the top-left corner.

Change the “File System” setting to
NTFS
.

On “Label,” type a name for the drive.
Use the default selection for the rest of the settings.
Click the
Add
button.
Click the
Apply
button.

Click the
Yes
button.
Click the
Close
button.
After you complete the steps, GParted will create the new partition using the settings you specified.
Delete drive partition using GParted
Using GParted, you can even delete partitions you don’t need using these steps:
Start your computer with the GParted USB drive.
Select the
“GParted Live (Default settings)”
option and press
Enter.
Select the
“Don’t touch keymap”
option and press
Enter
.
Select your language and press
Enter
.
Select
0
and press
Enter
.
Use the drop-down menu in the top-right corner to select the drive you want to resize.
Select the partition you want to delete, and click the
Delete
button.

Click the
Apply
button.

Click the
Apply
button.
Once you complete the steps, GParted will delete the partition that you selected. If you plan to delete the partition to extend the capacity of another partition, you can use the steps outlined above to resize a drive to extend the partition with the unallocated space.
Closing the tool is as simple as clicking the
GParted
button from the top-left corner, the
Quit
option, and then double-clicking the
Exit
button and the
Shutdown
button.