-
To zip (compress) files, open
PowerShell (admin)
and run the
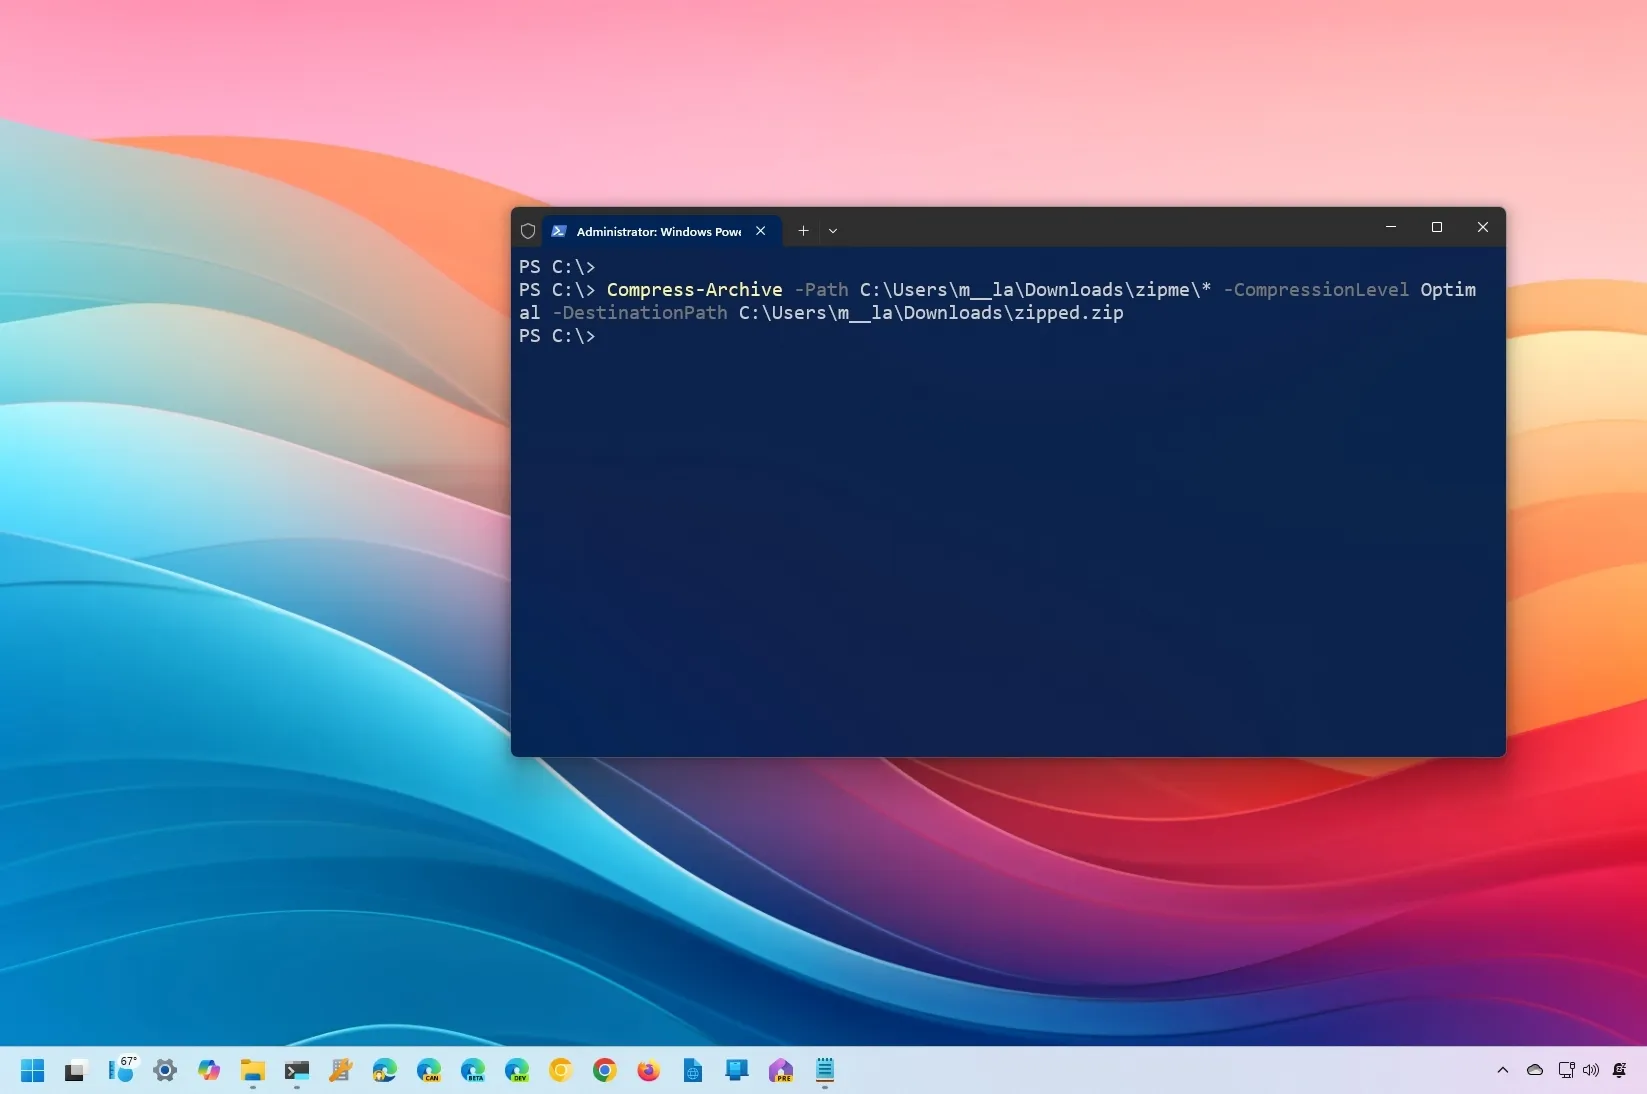
Compress-Archive -Path C:\SOURCE\FILES\* -CompressionLevel Optimal -DestinationPath C:\DESTINATION\ZIPPEDFILE.zip
command. -
To unzip (extract) files, open
PowerShell (admin)
and run the
Expand-Archive -Path C:\SOURCE\ZIPPED.zip -DestinationPath C:\DESTINATION\UNZIP
command. - You can also use PowerShell to add more files to the archival format or change the compression ratio.
On Windows 10 (or 11), you can use a zip file to package and compress files and folders for easier sharing or to store files that you don’t use frequently.
Although you can use File Explorer to quickly create a
zip file
or
extract the contents of a zipped file
, you can also use PowerShell to perform the same tasks more efficiently with commands. In addition, you can even select the compression ratio to zip files even faster or optimize to save space.
In this
guide
, I will teach you how to zip and unzip files and folders using PowerShell commands on
Windows 10
. Although these instructions are focused on Windows 10, they also apply to systems running
Windows 11
.
-
Zip files from PowerShell
-
Add more files to zip from PowerShell
-
Change zip compression ratio from PowerShell
-
Unzip files from PowerShell
Zip files from PowerShell
To zip files with PowerShell on Windows 10 (or 11), use these steps:
Open
Start
on Windows.
Search for
PowerShell
, right-click the top result, and click the
Run as administrator
option.
Type the following PowerShell command to compress and zip a folder with files and press
Enter
:

In the command, change the source and destination to match your specific paths. The wildcard
“*”
tells the command to compress the source folder’s contents.
Once you complete the steps, PowerShell will compress the folder and all its content, creating a new .zip file with a compressed version of the files.
Add more files to zip from PowerShell
To update the zip file with more files from PowerShell, use these steps:
Open
Start
.
Search for
PowerShell
, right-click the top result, and click the
Run as administrator
option.
Type the following command to update the zip file with additional files and press
Enter
:

In the command, change the source and destination to match your specific paths.
After completing the steps, the zip folder will be updated with the new files you specified in the command.
Change zip compression ratio from PowerShell
To change the compression ratio of a zip file using PowerShell, use these steps:
Open
Start
.
Search for
PowerShell
, right-click the top result, and click the
Run as administrator
option.
Type the following PowerShell command to compress files with different ratios and press
Enter
:

In the command, change the source and destination to match your specific paths.
If you want to specify the zip compression ratio, make sure to set the
“CompressionLevel”
flag with the ratio you want:
-
Fastest:
It uses less time to compress files, which may result in a larger zip file. -
NoCompression:
This method uses no compression, resulting in a zip file that is the same size as the total number of uncompressed files. -
Optimal:
It uses more time but compresses the files with the highest ratio.
Once you complete the steps, the zip folder will be created using the specified compression ratio.
Unzip files from PowerShell
To unzip files with PowerShell commands on Windows 10 (or 11), use these steps:
Open
Start
.
Search for
PowerShell
, right-click the top result, and click the
Run as administrator
option.
Type the following command to unzip a folder with files and press
Enter
:

In the command, change the source and destination to match your specific paths.
After completing the steps, PowerShell will extract all the files and folders from the specified zip container.
Update June 13, 2024:
This guide has been updated to ensure accuracy and reflect changes to the process.