-
To show hidden files on Windows 11, open
File Explorer
, click
View,
choose
Show,
and check
Hidden items.
-
Alternatively, open
File Explorer s Folder Options
page and check the
Show hidden files, folders, and drives
option from the
View
tab. -
You can also use the
dir a:h
or
dir a:d
commands on Command Prompt or
dir -force
or
ls -force
commands on PowerShell.
A new version of File Explorer on Windows 11 substitutes a simple menu with fundamental commands for the ribbon menu. Some settings, such the ability to display hidden files (and directories), are now harder to locate as a result.
Even though File Explorer no longer has the View tab, you may still use the legacy Folder Options or the View menu to see hidden files and folders in the new menu. To list files with the hidden attribute enabled in Command Prompt and PowerShell, you must use specific commands because altering these settings will only impact the items you are currently viewing in File Explorer.
I’ll walk you through how to make hidden files, folders, and drives visible in the File Explorer program on Windows 11 in this tutorial.
-
Show hidden files on File Explorer
-
Show hidden files on Command Prompt
-
Show hidden files on PowerShell
Show hidden files on File Explorer
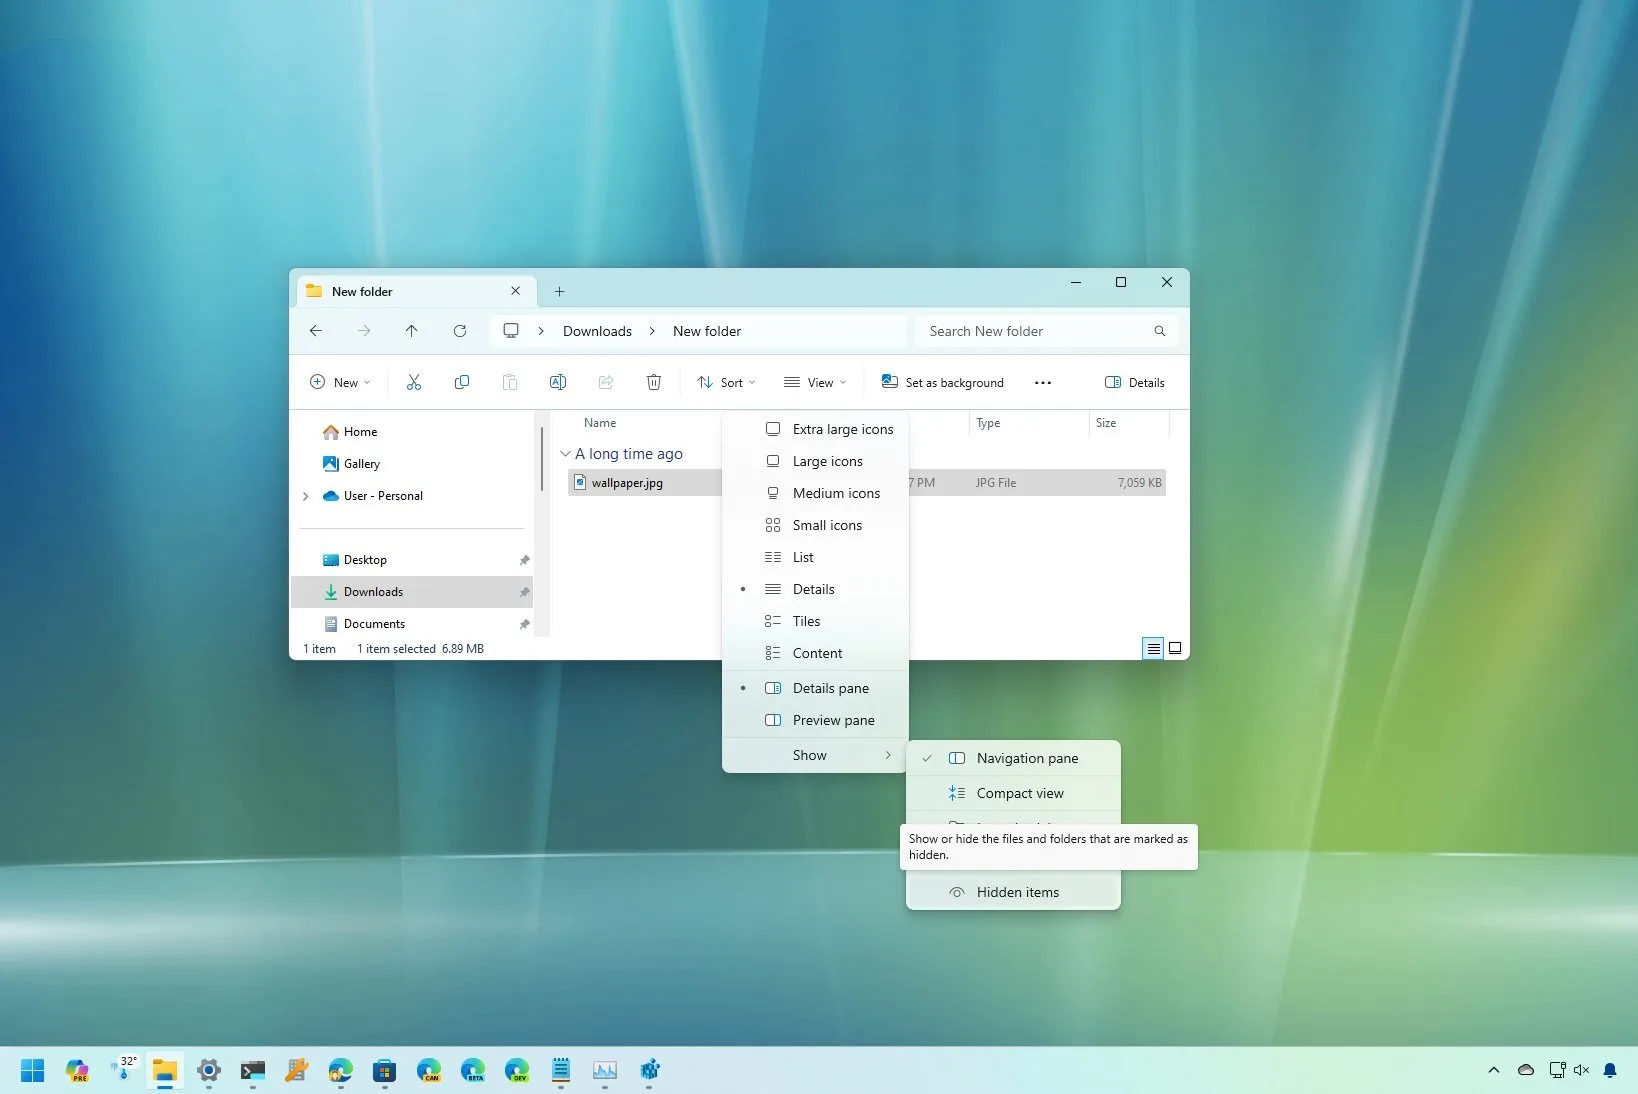
Follow these instructions to display hidden files in Windows 11’s File Explorer:
On Windows 11, open File Explorer.
From the toolbar, select the Viewmenu.
Click on the Hidden items option after selecting the Show submenu.

After completing the procedures, File Explorer will display hidden files and folders.
These steps can also be found in my YouTube channel’s video guide. (Remember to subscribe and like.)
From File Explorer Folder Options
Follow these procedures to use the Folder Options settings to view hidden files:
OpenFile Explorer.
Choose the Optionsitem by clicking the “See more” (three-dotted) menu.

Select the Viewtab.
In the Hidden files and folders group under the Advanced options section, make sure to check the Show hidden files, folders, and drives option.

Press the “Apply” button.
Press the “OK” button.
Once the procedures are finished, anyone utilizing File Explorer on Windows 11 will be able to see files and folders with the hidden attribute.
Show hidden files on Command Prompt
Follow these instructions to utilize Command Prompt to display hidden files and folders:
LaunchStart.
To open the console, search for “Command Prompt” and select the top result.
To access the directory containing the hidden files, type the following command and hit Enter:
(Option 1) To view hidden directories, type the following command and hit Enter:

(Option 2) To view hidden files, type the following command and hit Enter:

The command will display the concealed items for that specific place after you have finished the steps.
Show hidden files on PowerShell
Follow these instructions to use PowerShell to display hidden files and folders:
LaunchStart.
To open the console, search for “Command Prompt” and select the top result.
To access the directory containing the hidden files, type the following command and hit Enter:
(Choice 1) To view hidden files and directories, type the following command and hit Enter:

The PowerShell command will show the files and folders with the hidden attribute enabled once you’ve finished the procedures.
It’s crucial to remember that neither PowerShell nor Command Prompt operations will alter the system in any way to reveal the files and folders.
The operating system occasionally conceals particular files and folders for organizational and security reasons, which is why you might not be able to see them. By right-clicking the item, selecting Properties, and removing the Hiddenattribute from the General tab, you may always make a file or folder visible. Nevertheless, using system files for this purpose is not advised.
Update September 13, 2024: To guarantee accuracy and take into account modifications to the procedure, this guide has been revised.